Friday, February 8, 2013

PAM'S VEGETARIAN PAD THAI

Travelled to Thailand last week for our dinner.  Thai food has got lots of flavour, can  be a simple as you want or as complicated too!  Their dishes have lots of vegetables, crispy and sweet and also a  bit of heat.  Pad Thai is another favorite of our family, my son Rick does a wonderful job of putting this dish together (once I prep all the ingredients).  So it becomes a family affair, love having him in the kitchen.   This is a recipe that we put together with our favorite vegetables and a store bought sauce ( to save time).  One day I will get/find an authentic recipe for the sauce but for now we love this version.   I have used white rice noodles (Banh Pho )  and have recently found  brown Pad Thai noodles that are  delicious.
 
Pam's Vegetarian Pad Thai


The ingredients you will need.
 
Our favorite 'prepared' sauce.
Asian Family Pad Thai Sauce, perfect for our tastes.
 

Once the vegetables are all sliced, chopped and diced,
they are added to the pan with some oil and sauteed.

Drop the  rice noodles into very hot water and let sit
8-10 minutes, then drain.

The bean sprouts have been blanched, and the eggs
 cooked and chopped.

The tofu has been cubed and then tossed into  a cornstarch and
seasoning mixture.  Then into a pan with some oil that is hot.

The bean sprouts and snow peas are added to the vegetables and sauce.

The tofu is browning up very nicely.

Here are the toppings: sliced green onions, chopped cilantro
and  chopped dry roasted peanuts and of course a lime.

Add the noodles, sauce and toss well then top with the browned tofu.
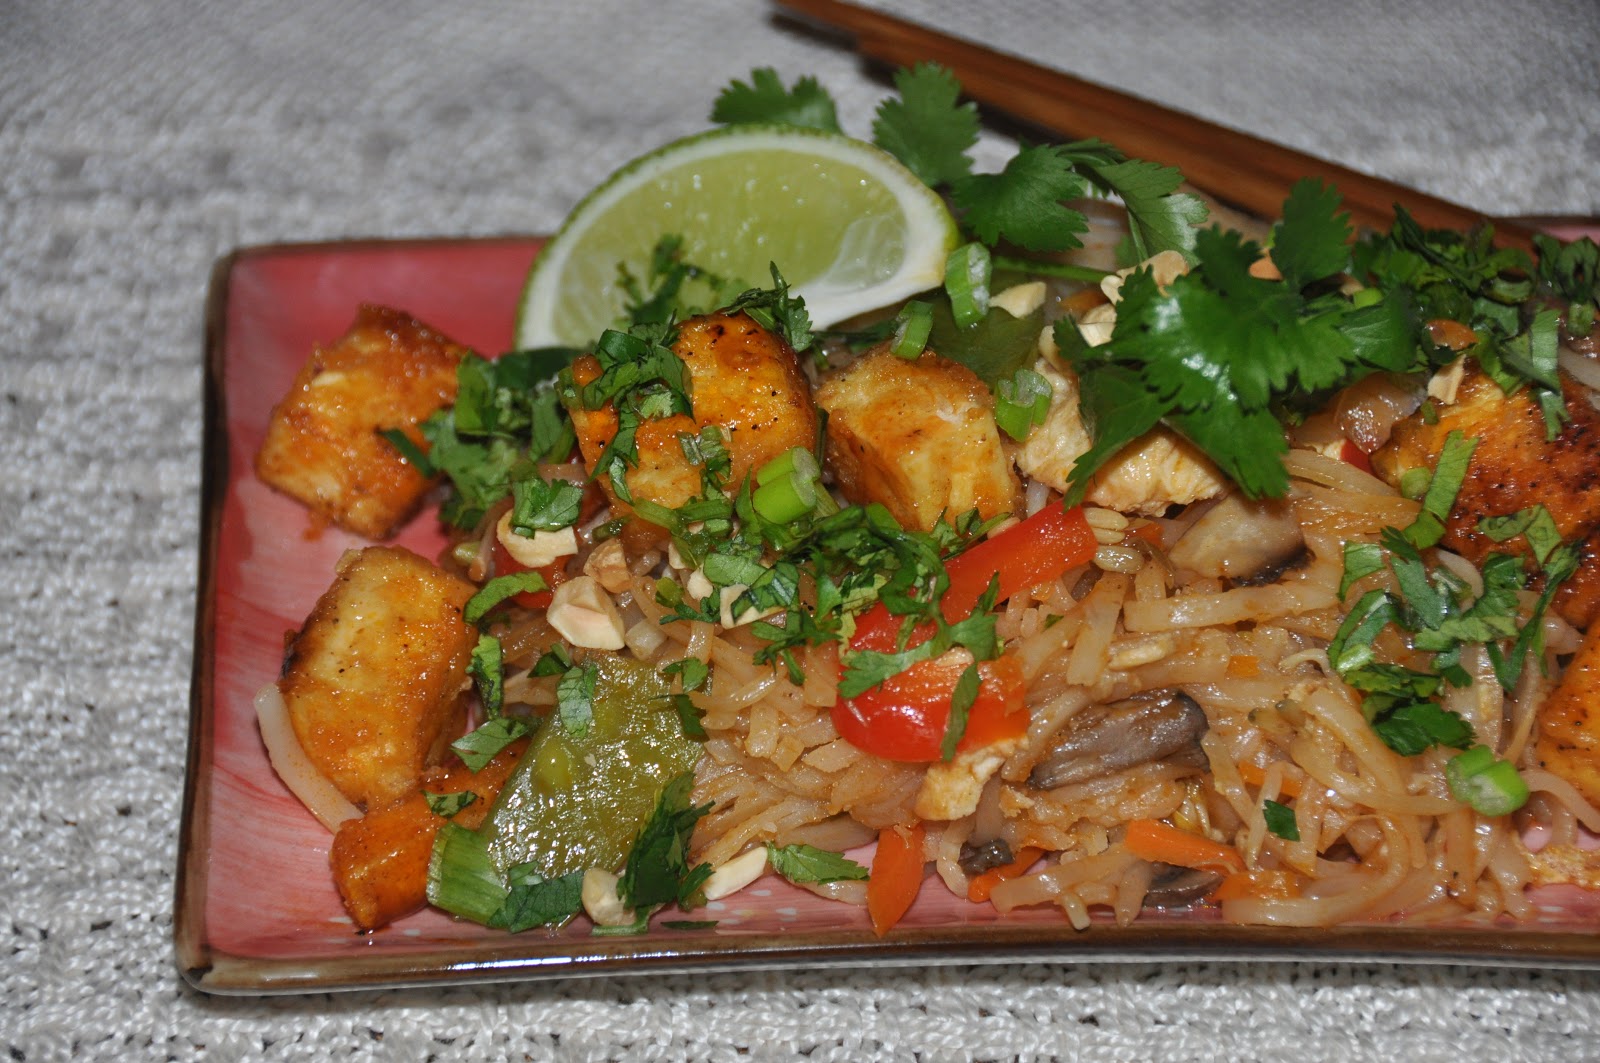


Pad Thai Pam style, ready to enjoy.
 
 
Vegetarian Pad Thai Recipe
 
Serves: 6-8
Ingredients:
4 Tablespoons oil
1 medium onion, sliced
3 garlic, finely chopped
1 medium sweet red pepper, cut into thin strips
1 carrot, julienned
1-2 cups mushrooms, sliced
1 cup or more snow peas
1 - 11/2 cups fresh bean sprouts - blanched in boiling water
(just pour boiling water over sprouts in sieve)
12 oz dried flat rice noodles - (1/4 inch wide sometimes called Pad Thai noodles or Banh Pho )
1 (14-16 oz) block tofu (firm or extra firm), drained, pressed and cubed
1 jar (300 ml) Pad Thai Sauce (I like Asian Family brand)
2 eggs, beaten and scrambled ( or cooked omelet style then sliced)
1/4 roasted peanuts (dry roasted or regular), coarsely chopped
1/4 cup cilantro, chopped
3 green onions, sliced diagonally
1 lime
Noodles - Method
Put the rice noodles into a large bowl and pour very hot water over them to cover. Let sit for 8-10 minutes and drain. Set aside.
Tofu - Method
In a Ziploc bag add: 1/4 cup cornstarch, 2 Tbsp garlic powder & 2 Tbsp Seasoned Salt.
Add the cubed tofu and toss well, making sure all sides of tofu are covered in mixture.
In a large saute pan, heat 2 Tbsp oil and add the tofu. Saute on high heat for 1-2 minutes (until browned)
Turn tofu over and brown other side, keep turning to brown all sides. Turn heat off and add 2 Tbsp of the Pad Thai Sauce. Set aside.
Pad Thai Vegetables - Method
In a large frying pan on med - high (on the higher side), add oil and then the onions and garlic, saute 2-3 minutes, add the carrots and red pepper
Saute another 2 minutes then add the snow peas, mushrooms and bean sprouts , saute 30 seconds - 1 minute. Turn heat down a bit and pour the jar of sauce onto the vegetables and add the cooked noodles. Toss well making sure all noodles are covered in sauce. Add the scrambled egg and tofu..
Toss well.
Serve with sliced green onions , chopped peanuts and chopped cilantro..... and lime wedges


'When you find yourself in the position to help someone,
be happy and feel blessed because God is answering that person's prayer through you.
Remember: Our purpose on Earth is not to get lost in the dark but to be a
light to others, so that they may find their way through us.'


Sunday, February 3, 2013

SPANAKOPITA (Spinach Pie)

Greece, this is a country I would love to visit one day.  It is definitely on my 'bucket list', I have been drawn to their food, their people, their sights and smells and beautiful blue ocean.   This recipe takes me back many, many years to  my very first 'permanent' job right out of College.  I started working at CP Rail (Canadian Pacific Railway) in Nelson, BC and enjoyed many jobs working my way to the top and with so many wonderful co-workers.  Imagine doing a payroll (manually) for 1500 people , yes that was before computers but I learned so many skills and made so many friends.  I was sad to leave but we were moving to Nakusp, BC - my husband was starting a new job.   We were on our first adventure together as a married couple.
I enjoyed every job I worked at and all the people I met and worked with.  The Spanakopita recipe is based on one from  my co-worker Helen (I wonder where she is today?) one day at lunch there was a an amazing aroma coming from the lunchroom, so I wandered there to find my friend and co-worker Helen warming up her 'leftovers' from her dinner the previous night. As I sat down to eat my lunch she explained to me what it was she was eating and then offered me a sample of her Spanakopita.  I had never heard of Phyllo ( fillo)  before and found it fascinating, so light and crispy.  The Spanakopita was delicious!  Helen shared her recipe with me and this is my version.  My family requests it quite often, our friends love it when I serve it along with a fresh Greek Salad and with leftover  Phyllo ( fillo) I  am able to serve a dessert of a 'fruit strudel -(what ever fruit I want to use ) along with this meal.....


SPANAKOPITA


Ingredients you will need.

Beat the eggs - you can cut the recipe in half very easily
  or make these in individual large cupcake pans.
 

Add the chopped, drained (well) spinach to the beaten eggs.
 
  Here the  dried oregano, freshly ground black pepper and
salt are added.

Mix in the crumbled feta cheese and sauteed onion (cooled) and set aside

 You will find Phyllo ( fillo) in the freezer section with the pastry
 defrost in fridge and then when ready to use place on counter,
cover with a damp towel and proceed to oil/butter.

I use extra virgin olive oil for my Spanakopita, I
drizzle some onto a sheet

Then use my hand to spread it over the whole sheet

 You will continue to drizzle olive oil on at least 6 sheets

 Add your spinach/feta mixture to the oiled Phyllo ( fillo) and
 continue oiling another 4-6 sheets of Phyllo ( fillo)  to cover the filling.

Make sure your top sheet of Phyllo ( fillo) is well greased
so that it will brown nicely.
 Place in a 350 degree oven and bake for 40-50  minutes.
 If the top is getting too brown just lay a piece of foil over
top (gently) and continue to bake until the
center pierced with a knife comes out clean.

The Spanokopita is ready.  Beautiful, fragrant and
ready to be served. 

  The spinach shows beautifully and the feta has melted
Serve with a fresh Greek Salad and garlic bread if you like.
Enjoy!
 
 
SPANAKOPITA RECIPE
 
1 package frozen chopped spinach, thawed & squeezed dry.
or 2 lb fresh spinach, chopped, cooked and drained.
1/2 - 3/4 package Phyllo ( fillo) (or 12 sheets)
6 eggs, beaten
3/4 cup feta cheese, crumbled
1 onion, chopped and sauteed
olive oil
salt and freshly ground black pepper
 2- Tbsp. dried oregano
 
  In a large bowl,  beat eggs and add salt,  black pepper and oregano.
Saute chopped onion in 1 Tbsp of olive oil. Let cool slightly. Add drained chopped spinach
 and crumbled feta cheese to the egg mixture and mix until combined.
Set aside.
Take your Phyllo ( fillo) and lay it on your counter and drizzle some olive oil over top
rub or brush over the whole sheet and lay into greased 9  x 13 inch  pan.
Continue with 5 more sheets of Phyllo ( fillo) - greasing and layering.
Add the egg/ spinach mixture and continue topping with 6 more sheets of Phyllo ( fillo)
that you have  oiled and layered.  Make sure the top is well oiled for nice browning.
Place into a 350 degree oven and bake
for 40-50 minutes.
If the top is becoming too brown just place a piece of foil over top (do not seal)
 and continue to bake until done.
 
 
With the leftover Phyllo ( fillo) you can make a very nice
Strudel for dessert - see below
 
Pear/Raisin Strudel before it has gone into the oven.

All baked, golden brown and crispy.


PEAR/RAISIN STRUDEL
 
 
Pear/Raisin Strudel Recipe (Pam's version)
Onto a  baking sheet, place one sheet of Phyllo ( fillo) and butter with melted butter
Continue until all sheets are used up.
Sprinkle 1/4 cup of oatmeal combined with 2 tsp cinnamon onto
the last buttered Phyllo ( fillo) sheet.
Take 3 ripe pears and remove pits and stems (I don't peel them) and slice thinly
on top of the oatmeal mixture (near the end of the Phyllo ( fillo) sheet)
Sprinkle with 1/8 cup raisins, 1/2 tsp cinnamon and 2 Tbsp brown sugar.
Fold in the ends of the Phyllo ( fillo) over top of the  pear filling and roll up 'jelly roll' style
 Butter the outside of the Phyllo ( fillo) roll, sprinkle with 1 tsp of brown sugar and bake at 350 for approximately 20-30 minutes.
Slice and enjoy with some whipped cream or vanilla ice cream.
 
Note:  I will use apples, peaches or any fruit that I see
needs to be used, in my strudel....always a treat and no
leftover Phyllo ( fillo) to deal with.


Happiness is a butterfly, which when pursued, is always just beyond your grasp,
 but which, if you will sit down quietly, may alight upon you.
 ~Nathaniel Hawthorne 


Monday, January 28, 2013

Khachapuri - A Georgian Snack


 Khachapuri,  so delicious as a  snack, meal  or with a bowl of  homemade vegetable soup.
This stuffed flat bread originates from The Republic of Georgia, a familiar place to our family.
My Grandparents and several of the Doukhobor families were exiled to a village called 'Troyetskaya' in the Republic of Georgia when she was a little girl.  I remember my Grandmother talking about her village and about the Cossacks raiding her village many times,  she said it was very scary for her as she was only ten  years old at the time.

Wherever you go in Georgia, you can be sure to eat Khachapuri at least once a day. These national cheese breads come in various shapes. They are so, so good! Georgians make this bread into a large loaf for special occasions, but street vendors also sell it in smaller, tart-sized diamonds, or "beggars' purses". There are several distinctive types of Khachapuri in Georgian food from different regions of Georgia. This recipe is probably the most common type but it has my own touch and ingredients which I love and which add special fresh herb flavors to the traditional just cheese filling. Serve Khachapuri for breakfast with a hot cup of Latte or fragrant tea, for lunch with a fresh heirloom tomato salad and you will fall in love with this fabulous dish.


KHACHAPURI


The ingredients you will need.

The   yogurt is added to the flour, salt, baking soda
mixture and kneaded together to make a soft dough.
 
 Mozzarella, feta and dry cottage cheese are
 sprinkled with herbs.  My choice are oregano,
basil, freshly ground pepper and red pepper flakes.
 
The dough has rested  while I mixed up the cheeses
and now is shaped into balls.  You need two balls
per one Khachapuri.
 
Two of the dough balls rolled out and
ready to be stuffed.
 
The  herbed cheese mixture is added on top
of one of the rolled out dough balls.
 
The second rolled out dough ball is added on top
of the cheese.
 
  Pinch the edges together with your fingers.
Make sure to let the air out before sealing
the last little bit.
 
With a rolling pin, gently roll out starting
from the middle and rolling to the edges.

Rolling it out fairly thin but careful not to
have it too thin so that the filling breaks through the dough.
 
 Place it onto a  cast iron pan heated to medium
high heat and let bake for  3 minutes then flip
and bake for another 3 minutes.
 
You will get 4  Khachapuri from this recipe.
 I double the recipe  because they freeze very well and are great
 for lunches.

Still hot from the pan, the cheeses have melted and
are oozing out from the bread.
 
You encounter this cheese bread all over The Republic of Georgia, in restaurants and in homes,
 and everyone makes it a little differently. There’s one area by the Black Sea coast called Adzharia, where they shape the bread like a boat, leaving the cheese exposed in the middle; before it’s served, butter and egg yolk are stirred in—just in case it’s not rich enough.
 In this picture I did not add the egg but thought you might like to see
 what the 'beggars purses' looked like.
 To this one I added some vegetarian 'ground round' to make it
a bit more substantial as a lunch 'sandwich' for my son
to take to work.
 
 
KHACHAPURI RECIPE
 
Yield: 4 'flatbread)

Ingredients for dough:
2 cups all purpose flour
1/2 teaspoon salt
1/2 teaspoon sugar
1/2 teaspoon baking soda
3/4 cup plain yogurt

Ingredients for cheese filling:
 7 ounces (200 g) mozzarella cheese, shredded*
5 ounces (150g) feta cheese*
3.5 ounces (100 g) dry cottage cheese*
salt, pepper
1 teaspoon dried oregano*
1/2 teaspoon dried basil*
black pepper to taste
red chili flakes to taste

In large mixing bowl, blend dry ingredients well, add the yogurt.
Mix together and knead to a soft dough. It should be a little sticky to the hand.
Set on a floured counter and cover with plastic, let it rest until you have mixed the filling ingredients
Put all the cheeses into a mixing bowl, add the herbs, salt and peppers and combine. Set aside.
Separate the cheese mixture into 4 equal portions
Take out the rested dough, cut in to 8 equal sections.
Flatten each piece of dough and roll into circles - approximately 5 inches in diameter
Put one portion of the cheese mixture on one of the circles, cover with another rolled out piece of dough.
Pinch the edges together to seal and roll out with a rolling pin to a thin 'pancake' approximately 10 inches in diameter . Set aside.
Continue with the other pieces until all dough and cheese is finished.
Heat a cast iron frying pan on med high heat, place one filled 'pancake' in the hot frying pan.
Let bake for at least 3 minutes, flip over and bake the other side another 2-3 minutes.
Remove from pan and set on a tray, continue to cook the rest of the filled Khachapuri.

*I used a 3 cheese mixture but feel free to use just the cottage cheese and mozzarella and you can omit the herbs.
*I liked the flavour the oregano and basil added to the Khachapuri.
 
 
 'Another day in your midst, which the sun softened with a kiss.
 Inside your heart are the tools to sculpt it as you please, so you can follow your bliss.'

Sunday, January 20, 2013

VARENIKI


Vareniki or perogies as some would call them are a traditional meal for our families.
These would be served on special occasions, New Years Day celebration for sure. I remember a few occasions where my Mother would hide (pennies wrapped in plastic) inside a few of the hand made Vareniki and the person who gets the one(s) with the penny inside makes a wish - it meant good luck in the new year to come.
Growing up in our family meant getting together with Aunts, cousins many times a year to make huge batches of Vareniki that we would freeze for later, but of course that meant we had Vareniki to eat for supper that night! These were served with some melted butter that we had made from our very own milk and sour cream (homemade of course) along with a green salad or freshly steamed vegetables from our vegetable gardens. These 'sessions' of Vareniki making would be a lot of fun for both kids and adults. The adults would have a day of catching up on family events and the kids would get to play (and do the running of errands) for our Mothers and Aunts and older cousins.
This kind of 'family time' was so precious now that I think back, the bonds that were formed continue be just as strong today. At first we just watched (as children are always doing) how the dough was made, how the fillings were made. Then slowly we were encouraged to participate and then as we grew older we had our designated 'job's for this gathering. Sometimes we sang while we worked which made the day move much faster..... but the best thing I remember was the warmth - the love - in the kitchen with everyone present.......ahhhh such good memories.


VARENIKI

A delicious meal.....comfort food.


 You need to beat the eggs and add the milk.

The flour and baking powder have been added.

All ingredients have been incorporated - dough is resting
and will be ready to be rolled out in about 10 minutes.


Potatoes are cooking for the potato filling

Potatoes cooked and drained waiting for 
the minced garlic to be added.

 Potatoes, minced garlic are mashed together, freshly
ground pepper is added and mixed in.

Ingredients for the potato filling.


Dry cottage cheese that is waiting for the eggs and salt
 to be added.


The dough has rested and is rolling out  very nicely.

I use a glass (the size I want) to cut my circles of
dough out.

Dough is cut and placed onto a floured tray.


I have moved everything over to my 'assembly station'
 *see video below for filling and sealing tips

 Vareniki all stuffed, sealed and ready to be boiled.


 Bring a pot of salted water to a boil, then drop in
Vareniki and let water come to another boil.


  Once Vareniki have floated to the top, continue
to  boil for 1 minute and remove with a slotted
spoon to a butter platter.


I have prepared these with melted  butter and some
cream and will be putting them into a 300 degree oven
for about 20 minutes  - we will be eating them later.
This will bake and the Vareniki will become nice and
puffy and they will melt in your mouth.

The pans of Vareniki ready for the plate or the oven 
if you would like to serve them later..
Enjoy

Short video clip on 'the method ' of sealing the Vareniki
Hope this helps......have fun


VARENIKI RECIPE


Vareniki
Vareniki dough:
2 large eggs, beaten
1 cup milk
3 cups all purpose flour (approx)
1 tsp baking powder
pinch of salt

Vareniki Fillings:

Cottage Cheese:
2 cups dry curd cottage cheese *(see note)
1-2 whole eggs (depends on how dry the cottage cheese is)
1/2 teaspoon salt
In a medium sized bowl combine the ingredients and set aside.
NOTE:  *(I like to freeze the dry curd then thaw and squeeze the liquid out very well)
(the freezing breaks down the cheese curds to a nice fine texture) - this my Mother taught me
Potato Garlic:
2 cups boiled salted and mashed potatoes
4 cloves garlic, minced
Put peeled and cubed potatoes into a pot, cover with water add salt and boil until tender
Drain and add minced garlic, mash until smooth
Set aside to cool.

Method:
In a large bowl beat eggs, add milk and mix well
In another bowl add flour and baking powder and mix well.
Pour egg mixture into flour mixture and mix until it comes together in a ball.
At this point you will see if you need to add a bit more flour, if dough is very sticky, add
only 1/8th cup at a time and gently knead it into the dough. I like the dough to be a bit on the
stickier side as I find it makes a nicer dough, easier to fill. You will be adding more flour when rolling out dough
On floured surface, roll out dough to about 1/4 inch thick. Cut out with a cookie cutter ( I use a glass ) if you like smaller
Vareniki use a smaller cutter/glass. Set aside onto a floured tray until all dough is cut and used up.
Take one dough cirlce and add 1 Tablespoon/teaspoon to the dough. Fold dough over to make a half cirlce, pinch edges together so they seal.
set on a floured tray and continue until the filling and dough is all used.
\In a large pot add water and salt and bring to a boil. Drop filled Vareniki (do not crowd ) into pot and cover. When it comes back to a boil, uncover and continue to gently boil until Vareniki float to the top - approximately 1-2 minutes. Remove with a slotted spoon onto buttered plate/platter and continue until you have cooked all the Vareniki. Serve with butter and sour cream.
A nice green salad or coleslaw is perfect with this meal.
Enjoy


"We can live without religion and meditation, but we cannot survive without human affection." _ Dalai Lama