Sunday, October 26, 2014

Thai Style Quinoa Salad

Our family loves salads and I try and serve a salad with each dinner meal. 
 We love the flavours of Thailand, the heat that is added from the peppers or hot sauces -
it warms the body from the inside out on a cool night.
The crunchiness of the vegetables in this salad makes one take the time to savour the textures and flavours of Thailand.
The addition of quinoa makes this a full meal or a perfect side to your dinner.
I still have Thai basil in my garden and that was the perfect finish to this salad along with a squeeze of lime juice! 
 
 
THAI QUINOA SALAD
 
The ingredients you will need for the salad.

The salad ingredients are sliced, and ready for the quinoa and dressing.

The ingredients for the Thai peanut dressing you will need.

Dressing ready to go.

Ah....the flavours of Thailand, this salad is both filling and nutritious! Enjoy.
 
 
 THAI STYLE QUINOA SALAD RECIPE
 
Serves 2
 
  • 2 heads romaine (or greens of choice), thinly sliced
  • 1 red pepper, seeded and thinly sliced
  • 1 large carrot, julienned
  • 1 small cucumber, julienned
  • 1 cup cooked quinoa
  • 1/4 cup chopped cashews
  • for the sauce
  • 2 tablespoons peanut butter
  • 1 tablespoon sriracha sauce (or other Asian hot sauce)
  • 1 teaspoon  vegetarian (fish) sauce
  • 1 teaspoon tamari
  • 1 teaspoon sesame oil
  • ¼ teaspoon ground ginger
  • 2 – 3 tablespoons water (or more as needed)
  •  
  •  
  •  
  •  
  •  
  • Instructions
  • Place vegetables into a large salad or mixing bowl.
  • In a small bowl, whisk together the dressing ingredients.
  •  Pour dressing over veggies and toss to coat.
  • Transfer to two plates, add 1/2 of the quinoa and 1/2 the cashews to each plate.
  • Serve immediately and enjoy!
THE MAGICAL POWER OF LOVE.
'Love heals heartache. Love gives hope and restores strength.
Love inspires the soul to shine in the midst of emotional storm.
Love makes all things bearable.'

Monday, October 20, 2014

Coconut and Raspberries are one of my favorite food combinations.  Growing up my Father would bring home fresh coconuts from the store and invite my brother and sisters out to the 'breezeway' so we could watch him crack it open.  We each had a little glass that would hold the coconut water found inside. So cool, so sweet so good for you.  Next came the cracked pieces from the coconut, Dad would hand each of us a piece of coconut (shell still attached) and let us pry our way into our personal piece of coconut. Raspberries were always grown in our family's garden and eating them right off the plant still warm from the sun was the very best.  (picking buckets and buckets was another thing) but this job was part of our chores and we always did our part. We also helped our elderly relatives and friends by picking their raspberries when needed and always enjoyed sampling each picking from the gardens we 'volunteered' at.  This cake is the perfect combination of coconut and raspberries....with the added crunch of the coconut streusel....what a treat.  As my friends and I gathered last week for a potluck lunch, this was my contribution. With fresh picked raspberries for the garnish.... Perfect with a cup of coffee in the morning or tea in the afternoon and delicious as a late night snack! I used frozen raspberries from the pickings over summer but when I first made the Raspberry Coconut Cake,  but when I made it the first time I used fresh raspberries that I picked from my garden. 


Raspberry Coconut Cake with Coconut Streusel

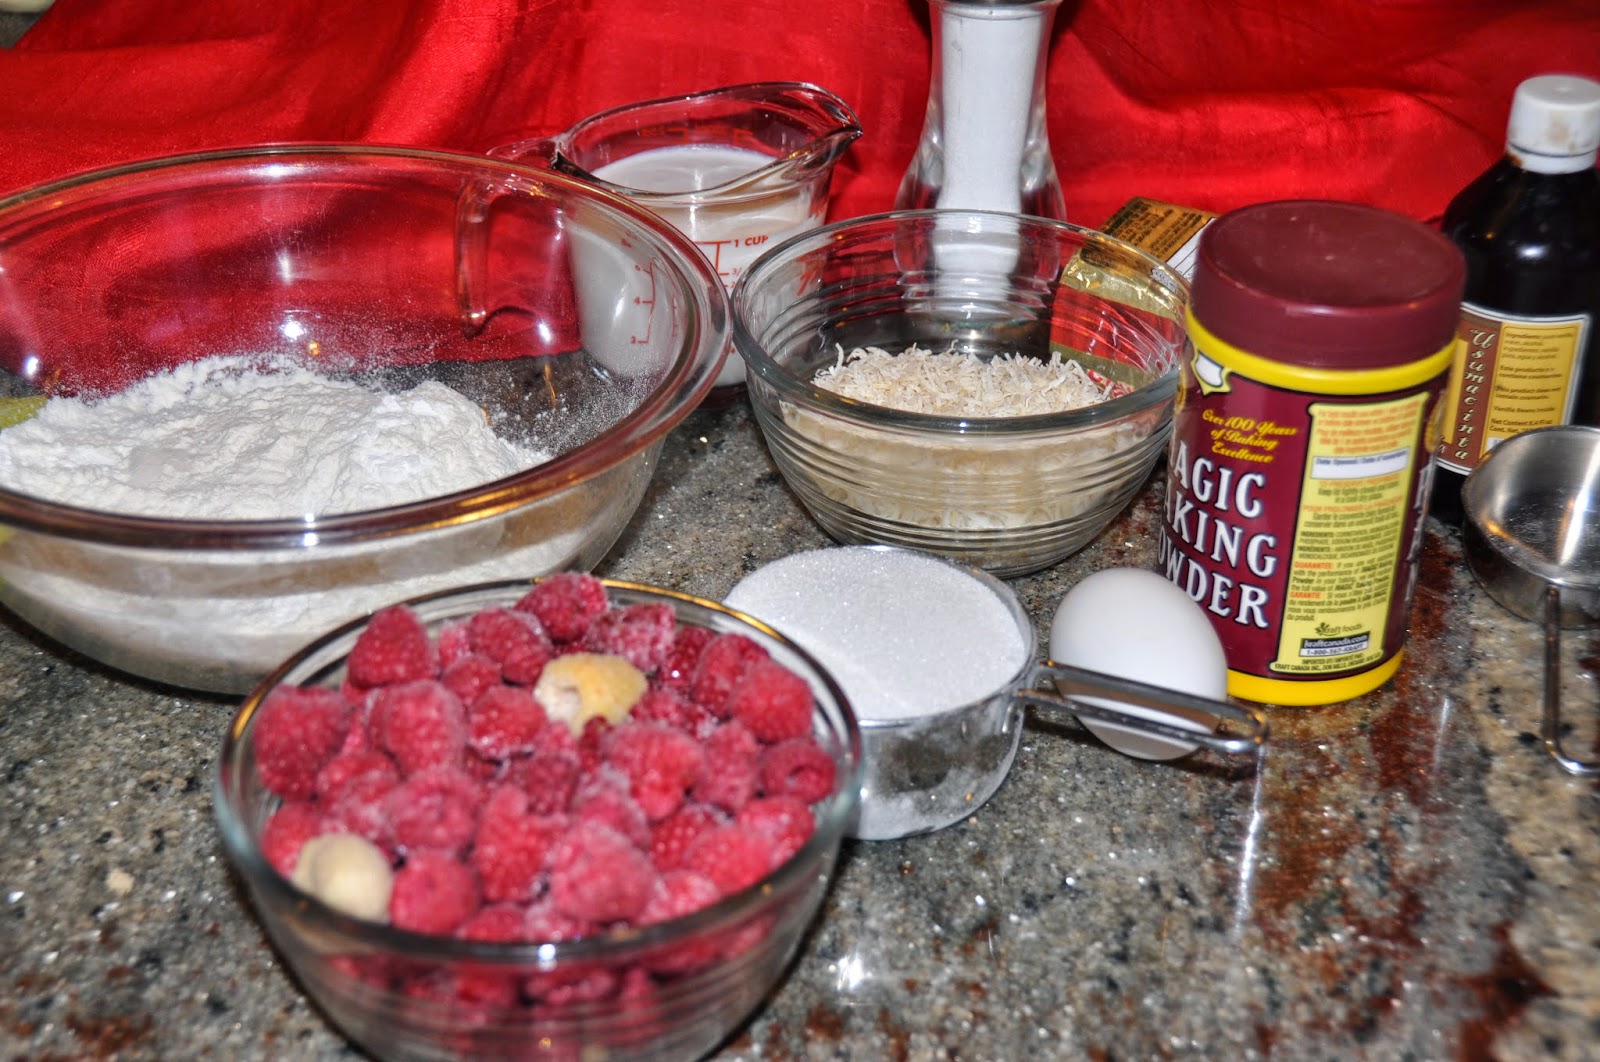
The ingredients you will need for the cake.

The ingredients you will need for the streusel topping.

The streusel topping all blended and ready to be sprinkled over the raspberries.
 The raspberries are sprinkled over the cake batter.


The Raspberry Coconut Cake is ready for the oven.
 
A lovely, tangy cake perfect for breakfast, lunch or supper!


RASPBERRY COCONUT CAKE WITH COCONUT STREUSEL RECIPE
ingredients:
For the cake:
1 1/2 cups all-purpose flour
1 1/2 teaspoons baking powder
1/2 teaspoon salt
6 tablespoons coconut oil
1 cup granulated sugar
1 large egg
1/2 cup coconut milk
1/2 teaspoon vanilla extract
3/4 cup sweetened flaked coconut
1 cup raspberries,(or more) fresh or frozen
For the Coconut Streusel:
1/4 cup all-purpose flour
1/3 cup brown sugar
1/3 cup sweetened flaked coconut
4 tablespoons cold butter, cut into pieces

directions:

1. Preheat oven to 350 degrees F. Butter a 9-inch springform pan or pie pan. Set aside.
2. Whisk together flour, baking powder, and salt in a medium bowl. Set aside.
3. In the bowl of a stand mixer, beat the butter and sugar until pale and fluffy, about 3 minutes. Add in egg, coconut milk, vanilla, and coconut extract. Mix until combined.
4. Gradually mix in the dry ingredients. Stir in the coconut. Transfer batter to prepared pan. Arrange raspberries on top of batter and slightly press them down.
5. To make the coconut streusel topping, in a small bowl combine flour, brown sugar, and coconut. Add in butter pieces and mix together with your fingers until crumbly. Top the cake with coconut streusel.

6. Bake cake for 45-50 minutes or until it is golden brown and firm to the touch. Let cool in pan for 15 minutes. Remove from pan and cool completely on a wire cooling rack. Cut into slices and server.

2. Whisk together flour, baking powder, and salt in a medium bowl. Set aside.
3. In the bowl of a stand mixer, beat the butter and sugar until pale and fluffy, about 3 minutes. Add in egg, coconut milk, vanilla, and coconut extract. Mix until combined.
4. Gradually mix in the dry ingredients. Stir in the coconut. Transfer batter to prepared pan. Arrange raspberries on top of batter and slightly press them down.
5. To make the coconut streusel topping, in a small bowl combine flour, brown sugar, and coconut. Add in butter pieces and mix together with your fingers until crumbly. Top the cake with coconut streusel.
6. Bake cake for 45-50 minutes or until it is golden brown and firm to the touch. Let cool in pan for 15 minutes. Remove from pan and cool completely on a wire cooling rack. 
 
'A 'Smile' is a sign of Joy. A 'Hug' is a sign of Love. A 'Laugh' is a sign of Happiness and
A 'GOOD PERSON' like you' is a sign of God's Blessing'

Sunday, October 5, 2014

Mexican Vegetarian 'Fish'.....according to Carlos


I have lived in many cities in British Columbia while my husband expanded his career, one of the cities we moved (this was our 6th move since 1979) to was Fort St John, British Columbia in 1999. A beautiful spot in Northern  British Columbia - the Peace Country.  As we drove from MacKenzie to 'see' the area we saw huge mountains through the Pine Pass as well as many creeks and rivers along the way, a drive of approximately 5 hours. As we got drove closer to Fort St John the landscape starts to change near Chetwynd, the mountains start to disappear and it becomes flatter and flatter until you see the fields of rye, wheat and the beautiful yellow canola.
What an amazing sight - like sunlight smiling all around you as you drive.
Arriving in Fort St John....two kids in tow...our eldest left it to us to find our new home.  We encountered hot sun and falling snow within the 4 hours we were there.  At this point I was 'not too sure' I wanted this to be our new home but it was the best step for my husband and our family.
While living in Fort St John I worked at the local college - Northern Lights College (yes we enjoyed many evenings watching the Northern Lights) something I wish all of you could experience.
I worked with many wonderful people and students - such wonderful memories.  One of which is when Carlos asked of me 'Pam, you being a vegetarian - what do you eat?' I told him there are so many choices that my family is always fed. I cook dishes from many different countries.  The next day he came to me with this recipe......just so I could add it to my 'Mexican' collection. 
Thank you Carlos, you were a pleasure to work with and my family enjoys this dish every time I make it. I encourage you to try this recipe......it is so simple, easy and oh so tasty!


The ingredients you will need.

All ingredients chopped and mixed together waiting to be shaped into patties.

The oil is heating in the pat waiting for the patties.


The Vegetarian 'Fish' Patties are in the pan and browning nicely.

The patties have browned on one side and flipped over for browning of the other side.
They look so good already!


Mexican Style 'Vegetarian' Fish....ready to enjoy.
Serve with a side salad, sliced vegetables. Top your patties with salsa, ketchup or even Tartar Sauce.
MEXICAN 'VEGETARIAN' FISH RECIPE
1large potato, shredded
the same volume(measure) of feta/goat cheese
1 egg
1 cup wheat germ
1 tablespoon onion, chopped fine
1 tablespoon cilantro, chopped fine
pinch of black pepper
1/2 teaspoon salt
Mix all ingredients together, shape into patties (or fish if you like)
Fry in oil until browned on both sides
Squeeze lemon over the patties and enjoy!
Serve with a salad or sliced vegetables.
'When you do things from your soul, you feel a river moving in you, a joy.'
Rumi


Thursday, September 18, 2014

Simple Vegetable Soup

Soup, comfort food that I remember eating at almost every meal while growing up.  Cool days are perfect for some hot soup and a simple Vegetable Soup made with vegetables from your very own garden - nothing is better than that.  This soup is just a base for what you can create, change up your vegetables,  add more or less tomatoes, if you like heat add some hot peppers it is so very versatile.
Growing up my Dad made homemade horseradish spread and this is must to eat with Simple Vegetable Soup along with a few tablespoons of dry cottage cheese...fresh homemade bread...
this sure brings back the memories!
It takes me back to my Mom and Dad's table, the smells, the laughter.....FAMILY
Enjoy.
 
 
Simple Vegetable Soup
 
Some of the ingredients you will need.

Butter melting

Onions, celery and carrots sauteeing in the butter, garlic will be added after

The tomatoes and quartered potatoes have been added 

corn will be added in the last 10 minutes (last minute decision)

Barley and steel cut oats are added and all will simmer for about 15 minutes
The corn, beans and diced potatoes are added in.

The quartered potatoes are removed
 

 Potatoes are mashed with the cream and butter, salt and pepper added


The mashed potato mixture is stirred into the pot and brought to a boil.
Soup is ready.
 
 
VEGETABLE SOUP RECIPE
 
1 medium onion, diced
1 carrot, diced
1 stalk celery, diced
2 cloves garlic, minced
2 cups tomatoes, fresh or canned (if using fresh, pulse in food processor)
4 medium potatoes, three quartered and one diced
1/2 - 1 cup chopped purple/green/yellow beans
1/2 cup corn, fresh or frozen
1/4 cup pearl barley
1/4 cup steel cut oats (Irish oats)
2 Tablespoons butter
1/4 cup whipping cream (or half and half if you prefer)
Salt, pepper to taste 

In a Dutch oven (or large pot) melt butter over medium heat, add diced onions, carrots and celery.
Saute until onion and vegetables are tender then add in the minced garlic. Saute for 2 minutes then add in the tomatoes, simmer for approximately 10 minutes then add the quartered potatoes and 6-7 cups of water. Bring to a boil then turn down heat and simmer until potatoes are tender enough to put a knife through them. Remove the potatoes to a bowl add  the cream and 1 Tablespoon of butter, salt and pepper, mash and set aside.
Add the barley and steel cut oats to the pot and simmer 15 minutes then add the beans, corn and diced potatoes. Simmer for another 10 minutes then stir in the mashed potato mixture.
Bring this to a boil and turn off heat. 
Soup is done!  I like to make this in the early afternoon and reheat for dinner.
I also pour some into jars and seal, storing them in the fridge until needed.


'Friendship consists in forgetting what one gives, and remembering what one receives.'
Dumas, The Younger


Friday, September 12, 2014

Rustic Beet Bread

We are getting closer to Fall (some communities faster than others) and with Fall come root vegetables. Beets are one of our families favorites, sweet, colourful and so nutritionally good for you.
We use beets in Borscht, sauerkraut, Vinegrette and other beet salads and dishes,
 today I baked bread with beets.
Thanks to my sister in law Ev Voykin for the challenge which inspired me to create this lovely, colourful loaf! I can see this on the table filled with homemade Cream of Mushroom soup, or a nice bit of colour on the buffet table.  A treat for a Valentine's Day lunch or any special occasion. Enjoy.
RUSTIC BEET BREAD

The beets and milk are blended together.

the blended beets and milk


Flour, yeast, salt, water, yeast and beet mixture all mixed together.

The dough has been kneaded and placed into my greased cast iron pan.

Bread dough after rising for 1 1/2 hours.

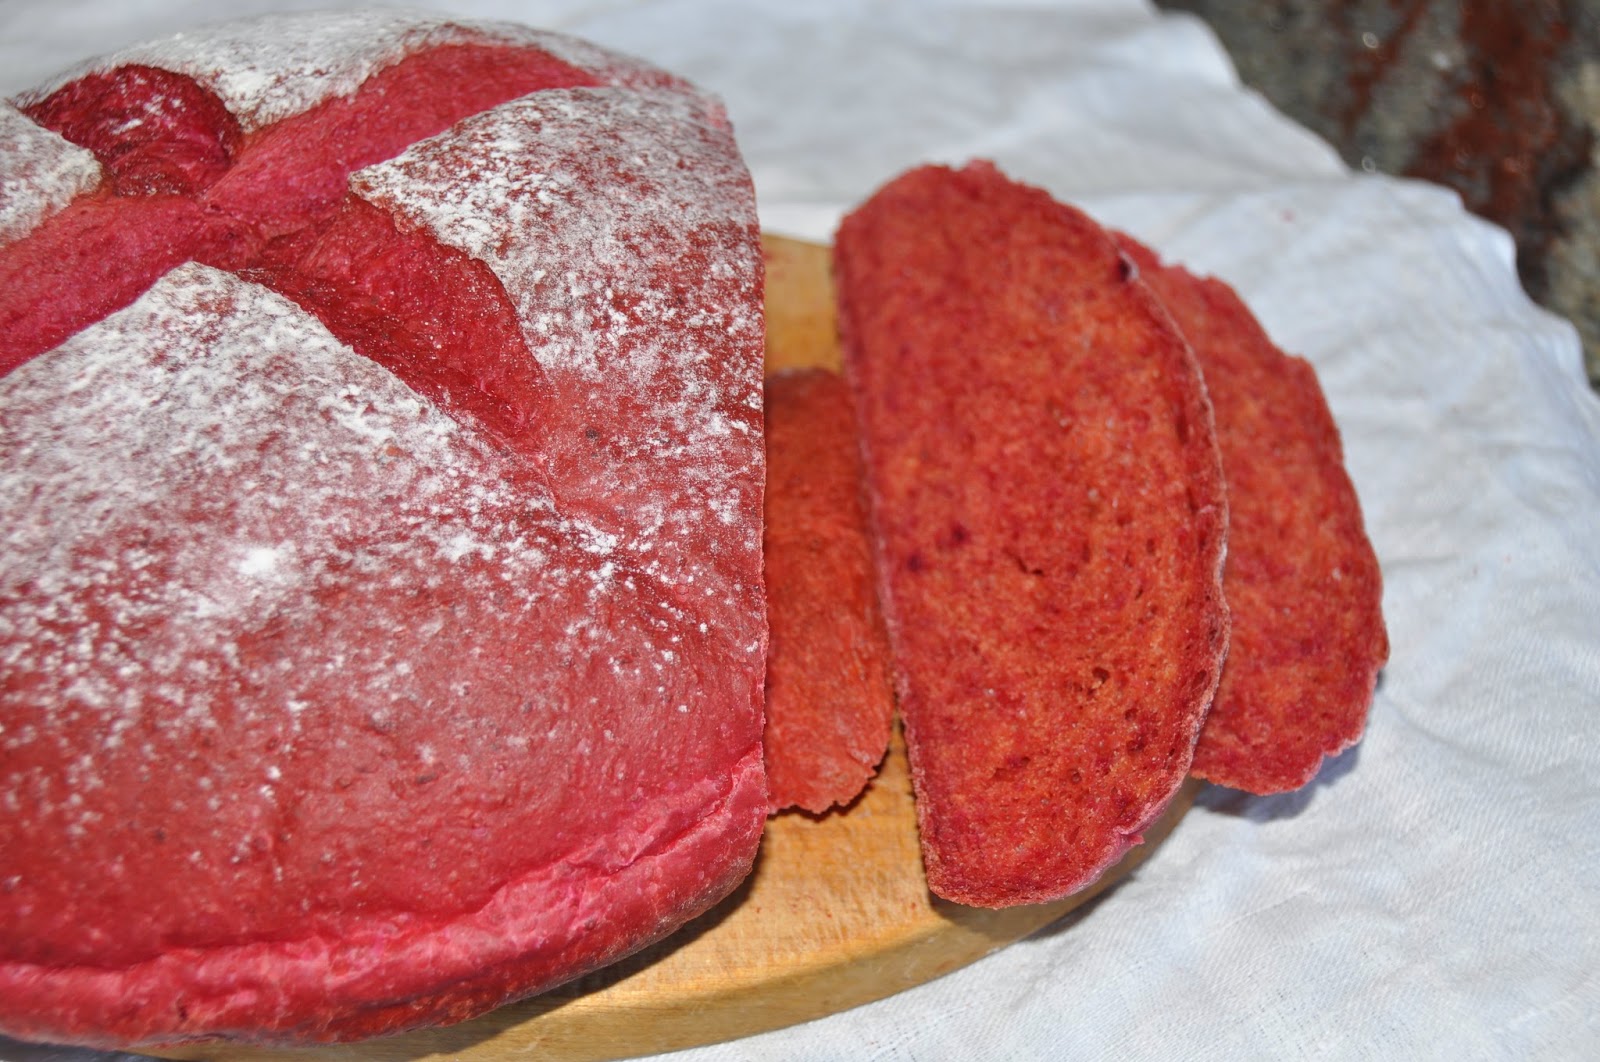
A lovely pink loaf fresh from the oven....


Rustic Beet bread sliced and ready for butter etc....such a lovely colour,
a nice light texture.......perfection.


RUSTIC BEET BREAD RECIPE

3/4 
cup warm water
1 1/2 
cups raw beet puree (about 2 1/2 peeled medium beets)*
3 1/2 
cups Gold Medal unbleached all-purpose flour
2 
tablespoons olive oil
2 
teaspoons salt
1 
teaspoon sugar
2 1/4 
teaspoons active dry yeast

DIRECTIONS

*To make the beet puree -- peel 2 large beets or 3 medium beets (discarding or reserving 1/2 of one of the 3 beets, so you have 2 1/2 beets), and chop into 1/4-inch pieces. Puree in a food processor with 1/2 cup milk until mixture is smooth and free of lumps.

In a small bowl, combine yeast, sugar and water. Let rest 5 minutes.

In the bowl of a stand mixer fixed with the paddle attachment, combine flour and salt. Add in yeast mixture, beet puree and olive oil. Mix until just combined.

Knead, by hand or in a stand mixer fixed with the dough hook, about 10 minutes or until dough is smooth and elastic. Place dough in a lightly greased bowl, cover and let rise until doubled, about 1 to 1 1/2 hours.

Remove risen dough from bowl and shape into a round ball. Place dough on a baking stone or parchment paper-lined baking sheet and cover loosely with a lightly greased piece of plastic wrap. Let rise until doubled, about 45 minutes to 1 hour.

Preheat oven to 375 degrees F with an empty broiler pan placed on the rack beneath where you'll put the baking stone or sheet. Before baking the bread, sprinkle the top with a little flour and make an X shape on the top with a serrated knife.

Place the bread in the oven and pour 1 cup hot water into the broiler pan, closing the oven door immediately. Bake 30 to 35 minutes, or until a thermometer inserted in the bottom center of the loaf reads 190 degrees F.

Allow bread to cool completely on a cooling rack before slicing or serving.

 
'Most people are mirrors, reflection the moods and emotions of the times; few are windows, brining light to bear on the dark corners where troubles fester. The whole purpose of education is to turn mirrors into windows.'


Friday, September 5, 2014

Tomato Soup (Baba and Mom's way).....and something more.

On August 26, 2013 I entered a post on Canning Tomatoes.  Today I am adding to the process and making a batch of Tomato Soup - after the tomatoes have been cleaned, blanched, peeled, cored and put into jars.  The tomatoes peels and cores are sitting in a large puddle of tomato juice that ran from my fingers as I peeled and cut the tomatoes.  It would be such a waste to see this go to waste - my Mother and Baba/Grandmother taught me to use what you have and this is the result.....I took this one step further this year by reusing the skins once more by dehydrating them and grinding them into a powder to use later when seasoning soups, sauces or stews.  This year when/if you can tomatoes I hope you try this soup!  Na Zdarovye.

TOMATO SOUP (Baba and Mom's way)


 You will need the tomato peels, cores and excess juice collected from peeling tomatoes for canning.
You will also need onions, garlic and celery stalks.

To finish the tomato soup you will need to add the ingredients above.

Potatoes and celery diced and waiting for the soup pot.


Browned flour for thickening the soup.

The browned flour mixed with milk waiting to be added to the tomato broth.

The browned flour has been added along with the rest of the ingredients.
This Tomato Soup is so tangy, velvety smooth and so delicious!

TOMATO SOUP RECIPE

Peels, cores and juices collected from the blanched, peeled and cored tomatoes.
Put this all into a large pot, add any amount of celery stalk, onions, garlic - to taste.
For a Dutch Oven I usually add 2 onions, quartered
6 - 8 cloves garlic, whole
1 - 2 stalk celery cut in chunks
seasoning salt (optional)

Place all the ingredients into a pot and cover. Bring to a boil, and then turn
down heat to low.  Simmer on low for 4- 5 hours.  After 5 hours removed the tomato skins and flavouring and place into a cheese cloth (or new pantyhose) squeeze out as much juice as you can.
Set aside the peel mixture. (see recipe for these below).
Place the tomato 'broth/stock' into a Dutch Oven and bring to a boil, add in
1/4 cup pearl barley
salt, pepper to taste
1/4 cup spaghetti noodles, broken up to 1 inch lengths
Season with salt and pepper
Simmer for 15 minutes then add:
1 medium potato, diced
Stir in:  1/8 - 1/4 teaspoon baking soda (to keep milk from curdling when added)
Stir in 1 - 11/2 cups milk, 1% or whole, your choice
Bring to a simmer and stir in the Browned Flour* (see method below)
You will notice the Browned Flour will start to thicken the soup and give it a lovely smooth texture.
Bring this back to a simmer, and simmer for 5- 10 minutes.
Remove from stove, season with salt and pepper to taste.
Enjoy!

*Browned Flour
1 cup unbleached flour
Place flour onto a baking sheet and bake at 350 for approximately 10-12 minutes.
You want to see the flour with a nice light brown colour.
Remove from oven and place Browned Flour into a small bowl, break up any chunks and stir in milk to make a smooth runny mixture.
This will be used to thicken the soup and also because of the 'browning' of the flour you will be adding a lovely toasty flavour to your soup.


Taking the peels and flavorings once step further......
The peels and vegetables that have been squeezed of their juices and onto a pan for drying.
(these are the ones you have set aside in the cheesecloth/pantyhose)
Spread these peels out onto a parchment lined pan and bake at 175 degrees C until dry and crisp.
This may take several hours.  If you have a dehydrator you can dry the peels on that.
Once the peel mixture is dry, place in batches in a coffee/spice grinder and grind to a powder.


Yum!
 
The finished product.  Store in a jar in a cool spot.
Look and smells amazing, deep roasted tomatoes......perfect for adding to soups, sauces or stews -
to deepen the tomato flavour!  My Baba would be proud that there was no waste with this Tomato Canning Session of 2014!
'Our BREATH is a profound gift.  Breathe into your dreams.  Breathe through the difficult places.  Breath in JOY.  Just Breathe.'

Sunday, August 31, 2014

Simple Tomato Sauce (Italian Style)

August is a great month for tomatoes, many are ready for picking and eating and also processing.
My friend John owns a nursery/greenhouse, (Coastal Sun Greenhouses)
 and this year his tomato plants produced extremely well.
One of his clients ordered 50 plants of cherry tomatoes but decided not to take them and John decided he would grow them in his greenhouse and sell them at the local Farmers Market.  The tomatoes did so well that he was picking 30-50 pounds a day and not knowing what to do with them, he put them in 5 pound bags and froze them!  I bought a few bags (10) of these frozen tomatoes and decided to make some tomato sauce for winter eats.  My best friend Helena explained to me how the Italian community (her sister is married to an Italian) makes their tomato sauce. Thank you dear friend.  This is the basic process, I have added measurements as per my 'recipe'....delicious, simple, fragrant and a great way to use the tomatoes and the basil from my garden.   I do not peel the tomatoes as I like the added fibre of the peel but do use a hand blender to blend all ingredients for a beautifully smooth tomato sauce.  I add mushrooms, shredded cheese to this basic tomato sauce for pizza, lasagna, and even poaching eggs for a breakfast treat served over my sourdough English Muffins.....Yum!  I do hope you your try this wonderful tomato sauce.


ITALIAN STYLE TOMATO SAUCE

This sauce is perfect for some spaghetti noodles, a lasagne or even eggs poached in it for breakfast..
The ingredients you will need......tomatoes....either cherry or other varieties.

Garlic

 Fresh basil,  above,( olive oil, salt and red pepper flakes (not shown)

Combine all ingredients  (except tomato paste) in a large pot and bring to a simmer
  
One small can of tomato paste

All the ingredients are in the pot and are starting to cook.


The tomato sauce after it has been simmering for about an hour.

The tomato sauce after simmering 5 hours and after being blended.
The tomato paste is stirred in and simmered once again.


 The completed sauce, so thick and fragrant and ready for your dish of choice.

SIMPLE TOMATO SAUCE (Italian Style)
7 pounds tomatoes
1 head garlic, peeled
1 bunch fresh basil leaves (approximately 1 cup loosely packed)
1/4 - 1/3 cup extra virgin olive oil
1-2 Tablespoons salt
1 small can Tomato Paste
red pepper flakes (optional)
Place tomatoes (I used cherry tomatoes but if you are using larger tomatoes chop into quarters)
into a large pot, peeled whole garlic cloves, basil leaves, olive oil, salt (to taste) and red pepper flakes.  Bring to a boil at medium/low heat and then simmer gently for approximately 4-5 hours.
adding another 3-4 Tablespoons of olive oil half ways through. After the 5 hours stir in the tomato paste and bring back to a simmer, let simmer for another 10 minutes. Taste and adjust salt.
Using a hand blender, blend all ingredients together to make a smooth sauce.  Pour into sterilized jars and seal.  Process 12 - 15 minutes in water bath.  When cooking you can  add mushrooms, more vegetables or cheese for a little more protein.
This recipe makes approximately 18- 20 cups of sauce.
Enjoy.


'Place your hands into soil to feel grounded. Wade in water to feel emotionally healed. Fill your lungs with fresh air to feel mentally clear. Raise your face to the heat of the sun and connect with that fire to feel your own immense power.'