Sunday, April 27, 2014

Baba's Kalachi.....a delicate biscuit..... full of cinnamon and love.

Kalachi.....cinnamon filled biscuits that Grandmother and Mom made since I was a very little girl.  The kitchen smelled amazing, and the biscuits even more.  Baba and Mom also made these same biscuits topped with an assortment of homemade jams.  They are portable, perfect to take to a friend's for tea, a potluck for dessert or to have for breakfast with a cup of coffee or tea.  They appeal to both children and adults and are hard to resist.....the morning I made these I had some gravel being delivered to the house and the lucky gentleman that delivered it so promptly and with a smile left with a few of these in his hands.....an even bigger smile than he arrived with.

 
Baba'a Kalachi (Biscuits)
 

The ingredients you will need.

Cut the butter into the flour (I use a pastry blender)

The sour cream waiting for the eggs and vanilla.


Gently mix the wet ingredients with the dry and form into a ball.
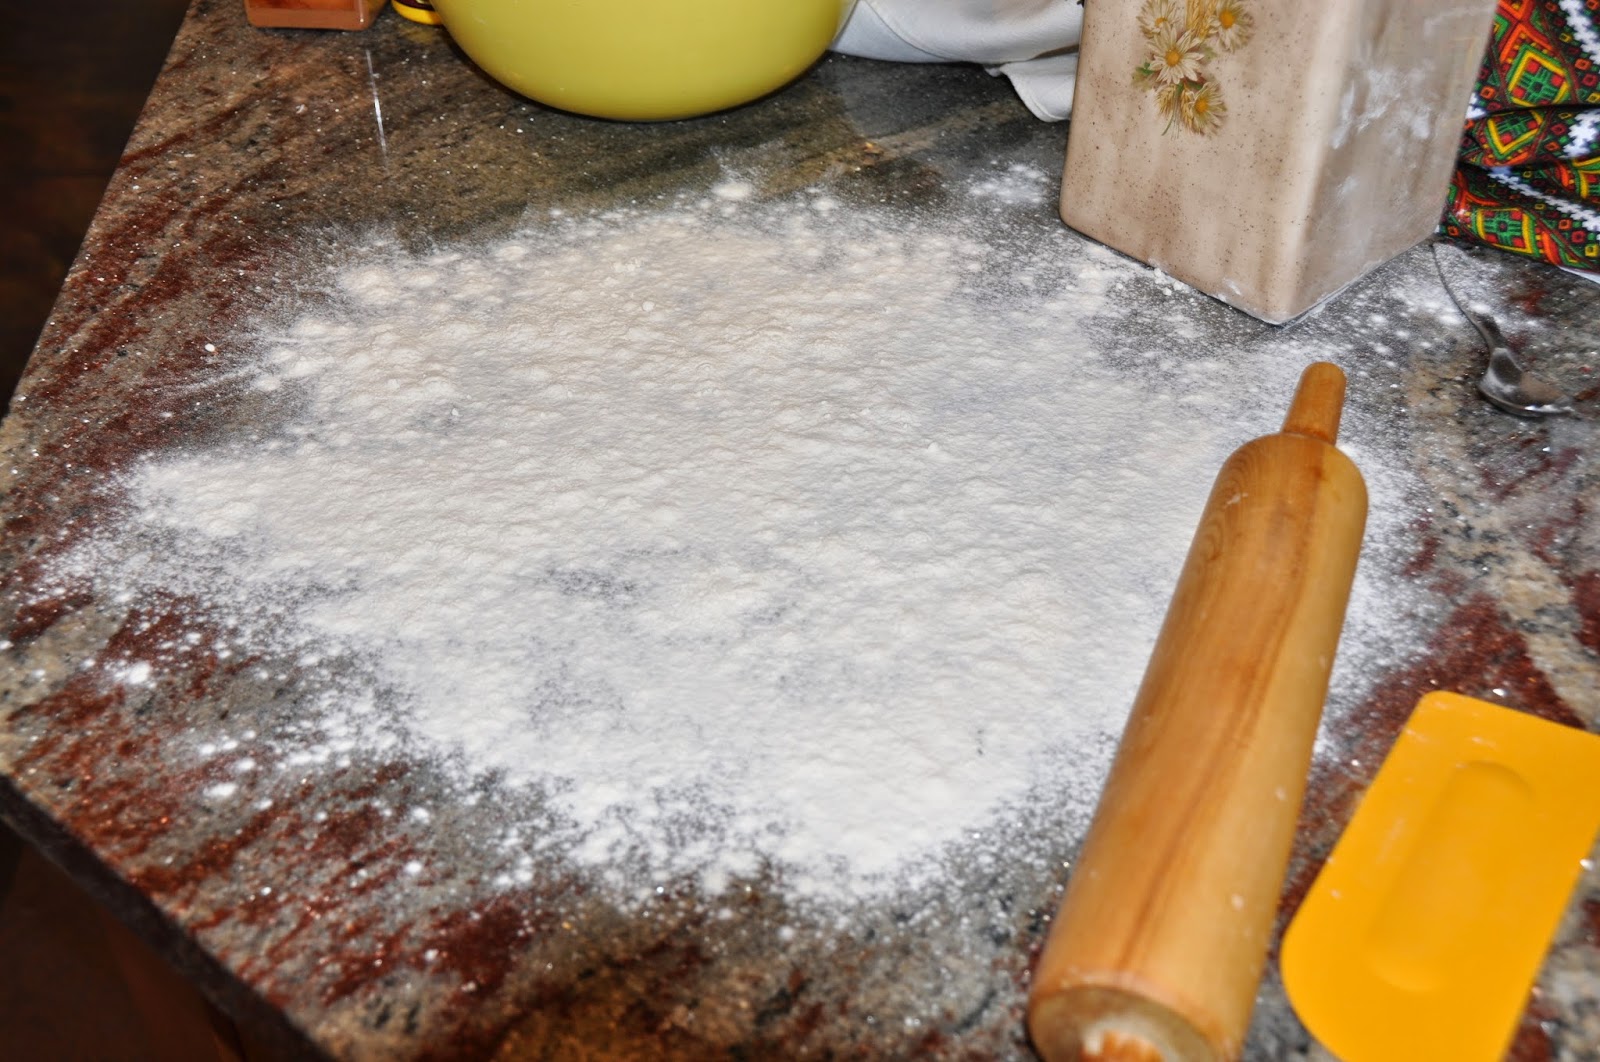
Generously flour your counter and place the dough onto it.

Dough is rolled out to 1/2 inch thickness, brush dough with melted butter. 
(I set a piece aside for the jam biscuits)

Cinnamon and sugar are sprinkled over the dough.
 

The cinnamon/sugar filled dough is rolled up 'jellyroll style'.
Edges are pinched together to keep the filling inside.
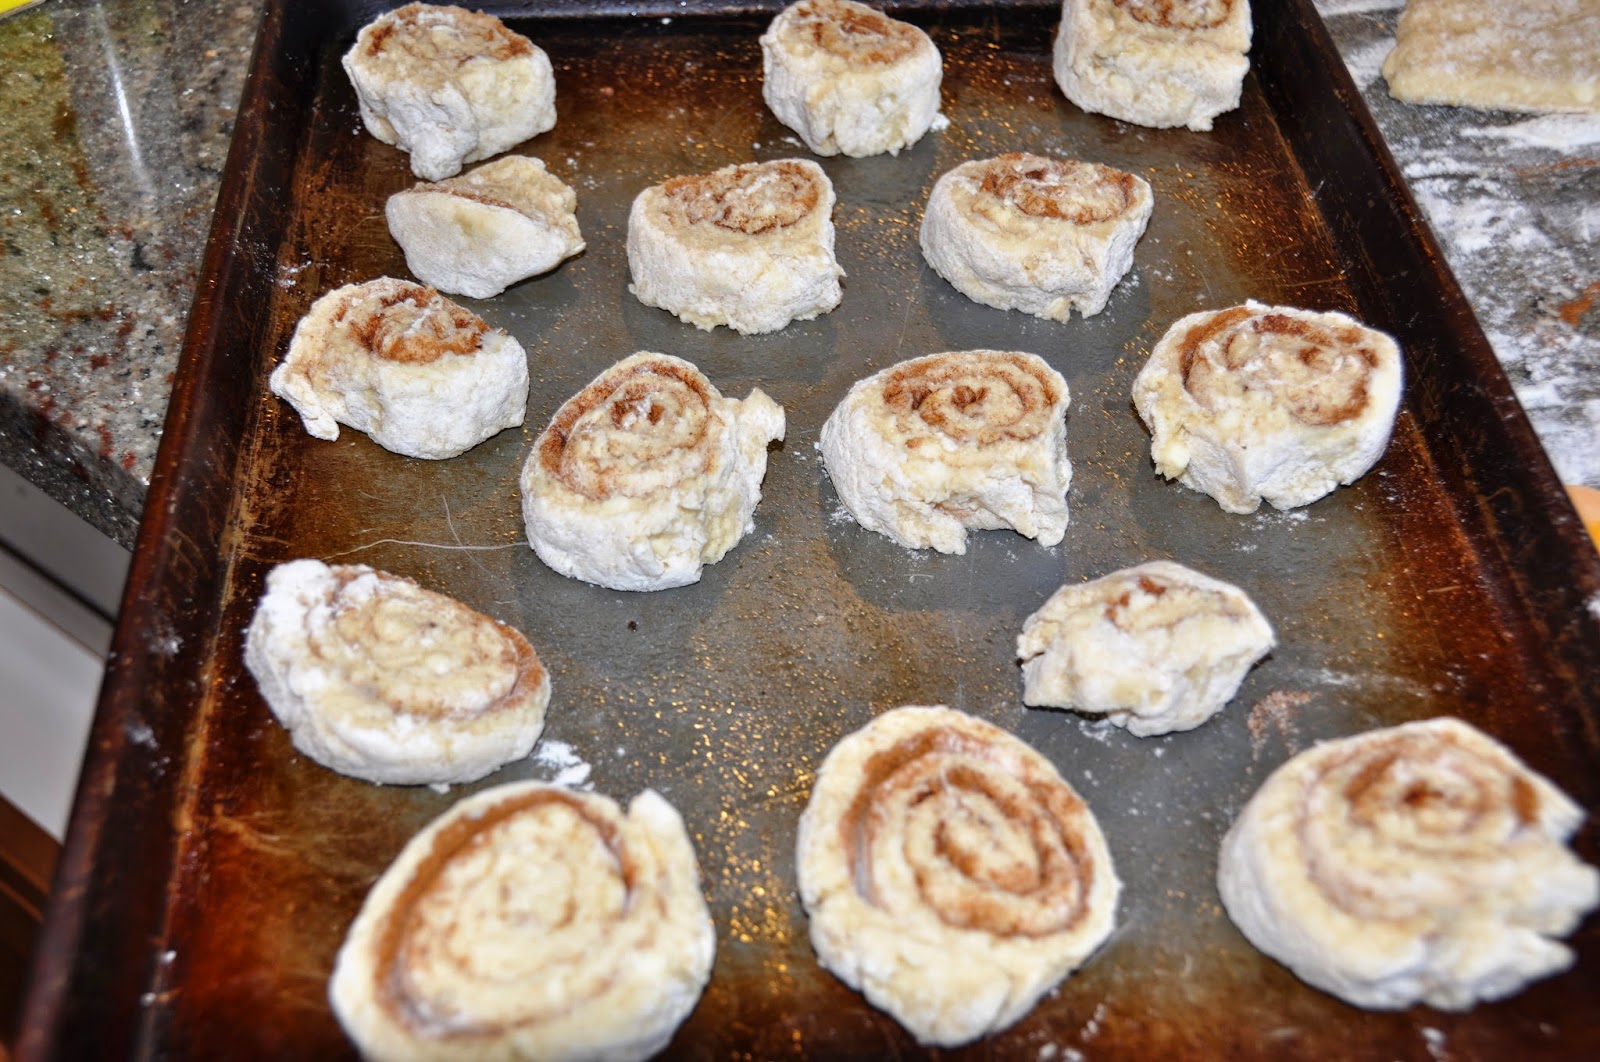
Slice into pieces 1/2 inch thick (I use a piece of dental floss,
slipping it underneath and crossing over on top to 'cut', makes for a nice round shape.)
Brush the tops with beaten egg and bake.

Mmmm....they are crispy on the outside, soft and buttery .....so delicious.
 

Jam/Jelly topped biscuits -  just as tasty!
 
BABA'S KALACHI RECIPE
 
2 1/2 cups flour
1 cup butter
1 1/2 Tablespoons baking powder
1/2 teaspoon salt
1/2 cup sugar
2 eggs
2 teaspoons vanilla
1/2 cup sour cream or buttermilk
(use a pinch of baking soda if using sour cream or buttermilk)
Filling:
 2-3 Tablespoons melted butter
2-3 Tablespoons Cinnamon
2-3 Tablespoons Sugar
1 egg, beaten (for the egg wash)
 
In a large bowl cut butter into the first 5 ingredients with a pastry blender until mixture
is the size of small peas.  In a small bowl beat together the sour cream, baking soda and vanilla.
Combine the sour cream mixture with the flour mixture until it comes together into a ball.
Place dough onto a well floured counter and roll out to 1/2 inch thick.
Brush with melted butter, sprinkle with sugar and cinnamon.
Roll up 'jellyroll style' from long end and pinch the edges closed.
Slice into 1/2 inch wide pieces and place on greased baking sheet.
Brush with the egg wash mixture and bake in a preheated oven set to 375-400
 for approximately 15 minutes, until the bottom and top is lightly browned.
 
For the jam/jelly topped biscuits:
Set aside some of the dough and roll out to 1/2 inch thickness.
Cut into circles and place on greased baking sheet.
With your finger press a hole into the center of each biscuit and top with
1/4 teaspoon of jam/jelly of your choice. 
Bake as above.
These biscuits freeze very well....but they usually don't last that long in our home.
Enjoy!
 
 
'I shall pass through this world but once.  Any good, therefore, that I can do,
or any kindness that I can show, to any human being,
let me do it now.
Let me not defer it or neglect it, for I shall not pass this way again.'
...Robert Collier....


Tuesday, April 15, 2014

Potato(less) Potato Salad.....made with Cauliflower

Road trips, picnics or family brunch/lunch/dinners.....making a salad is a great addition to any meal. My daughter Anastasia and I enjoyed a drive to Kamloops for a job interview she had and we wanted to bring a lunch that was healthy, filling and easy to eat on the road (or beside the road).   I came across a recipe that used Cauliflower in place of potatoes in a salad. We love potato salad but not all the carbohydrates that they contain, Cauliflower was the perfect substitute and I had a nice large head in my fridge.  To keep the carbohydrates low I use Vegenaise instead of Mayonnaise.  I hope you try this recipe soon, perhaps with all those leftover colourful Easter Eggs!


Potato(less) Potato Salad


Some of the ingredients you will need. 

The cauliflower is ready for steaming. (2-3 minutes)

Eggs are hard boiled and cool, ready for peeling and mashing.

You will need some vinegar (I used white but cider vinegar/white/red wine vinegar will work too).

The dressing is all mixed together, celery leaves chopped
 and at the top - pickles and onions are chopped and ready to be added.
 

Here is the steamed and chopped cauliflower. I like this size of pieces in my salad.
 
The eggs have been mashed with a fork.

Here you see all the ingredients ready for tossing.
Mix everything together and add chopped fresh parsley.
I also like to add shredded head lettuce just to bulk up the salad.
Refrigerate for 1-2 hours to let all the flavours blend, enjoy!


Potato(less)  Potato Salad Recipe
 
1 medium sized head of cauliflower
6 eggs, hard boiled and mashed
5 Tablespoons Vegenaise (or Mayonnaise)
3-4 Tablespoons Dijon mustard
1/4 cups pickles chopped finely (2-3 pickles)
3 Tablespoons celery chopped fine
1/8 cup onion, chopped fine (green onion is also good)
1/4 cup parsley, chopped fine
3 Tablespoons white vinegar or pickle juice
salt, pepper to taste
1-2 cups shredded head lettuce
 
Break the cauliflower into pieces (florets) and steam with a bit of salt.
Drain, cool and chop into smaller pieces. (see photo)
In a large bowl, mash the eggs until they are slightly chunky,
 combine with the cauliflower, pickles, celery and onion.
In a small bowl mix together, Vegenaise*, Dijon mustard, and vinegar.
Mix dressing into the cauliflower/egg mixture and season with salt and pepper.
Add in shredded lettuce and chopped parsley, chill and enjoy
This recipe is easily halved or doubled.
 
*Vegnnaise can be found in the grocery store in the organic section or near the Mayonnaise
 

 'Behind me is infinite power, before me is endless possibility, around me is boundless opportunity.
Why should I fear?'


Saturday, March 22, 2014

Mushroom Eggs.....an easy breakfast treat

Hope everyone is having a great day today! This morning I treated my husband to one of his favorite breakfasts, Mushroom Eggs.  When I married my husband 34 years ago I inherited two wonderful Sister in laws and from each one I have received some great ideas for meals. I first tasted something like this at my Sister in law Marilyn's home and ever since it has been one of our breakfast staples.  So easy to put together, very tasty and filling.  This is a perfect dish to make on those Holiday mornings such as Christmas, Easter, Thanksgiving when the house is full of family or friends and you need to put breakfast on the table and  visit with your family and friends too!  This can be made the night before, or the morning of and while it bakes in the oven you can enjoy your first cup of coffee and a visit, while your breakfast bakes.  All that is needed to complete this meal is a nice soft bun or a
piece of multi-grain toast, a plate of fruit or a fruit salad.

MUSHROOM EGGS

So good, so filling, so easy!

 The ingredients you will need.

Spray muffin tins with oil and add the bread crumbs (add herbs if you like)
 (I make my own breadcrumbs with leftover crusts that I toast and store in a glass jar)

Add a slice of cheese (your choice)

Break an egg onto the cheese.

In a small bowl empty the can of mushroom soup and whisk in the milk.
Spoon about 2 tablespoons of the soup mixture onto each egg.

The Mushroom Eggs baked and ready for toast.
Spoon the eggs out onto the toast, make sure you get all the sauce too.

Mmmm.....so good, nice and hot, a perfect breakfast treat any day of the week.
 A bowl of fruit salad is all you need to finish off a perfect morning meal.  Any leftovers are wonderful as leftovers when reheated the next day.  

MUSHROOM EGGS RECIPE

Eggs, (2-3 eggs per person)
1 can mushroom soup (condensed)
1/4 - 1/3 cup milk (per can of soup)
bread crumbs
cheese
Toast, buns or bread of your choice.

Spray or grease muffin tins with oil
Into each muffin tin add:
2 teaspoons bread crumbs
1 slice of cheese
1 egg
Top each egg with 1-2 Tablespoons of the soup mixture.
Put filled muffin tins onto a foil line tray (this helps keep the mess to minimal)
Place into a preheated 350 degree oven.
Bake for 20-25 minutes until eggs are set.
Serve over toast, on a bun or bread of your choice.
Cook the leftover mushroom soup/milk mixture and spoon over top of eggs and toast as a 'sauce'.
Enjoy!

'This very moment is the perfect teacher, and, lucky for us, it's with us wherever we are.'
-Perma Chodron


Wednesday, March 19, 2014

Grilled Cheese ' with a Twist'


Grilled Cheese 'with a Twist'
In our home we love cheese, grilled, melted or just as a snack.  When I make a pot of homemade soup I like to make grilled cheese sandwiches to eat with it. My family likes a bit of 'heat/spice' in their foods by my palate can't handle too much heat so I make up these Grilled Cheese Sandwiches.  I added Pickled Hot Mix, (this mix has just enough heat for my palate) which contains a variety of vegetables (cucumbers, cauliflower, hot banana peppers) that I found in the grocery store.
 This jar of Hot Mix is wonderful to have in the fridge to use for many dishes,
                                                such as a quiche or even into appetizers.
We always have a few different cheeses in the fridge and I like to mix a few of them together in this Grilled Cheese Sandwich mix.  I love to grill them up for lunch, to eat with a salad and even toast some up as 'Open Faced Sandwiches'. I sometimes add chopped canned mushrooms or finely chopped fresh mushrooms that I have sauteed for a few minutes, the additions are endless! This cheese mix will sit in the fridge for at least a week, but mine doesn't usually last that long!

 The ingredients you will need.

The Hot Pepper Mix, garlic and onion all chopped.

The cheeses have been grated.

Then mayonnaise, mustard, salt and pepper are mixed in and it's ready for the bread.
You can even stuff this into jumbo pasta shells for some interesting appetizers!


Here is my recipe:


Pam's Grilled Cheese Sandwich Mix Recipe

1 cup Hot Pickle Mix
1-2 cloves garlic
1/2 small onion
Put all the above ingredients into a food processor and process until finely chopped,
 but don't over process, you want to taste the bits of Hot Pickles.
In a large bowl:
 Grate 2-3 cups of cheese (your choice of cheese),
I usually use Cheddar, Mozzarella and Asiago cheeses.
To the shredded cheeses add:
4 tablespoons light Mayonnaise
2 tablespoons Dijon mustard
Salt, pepper to taste
Add the chopped Hot Pepper Mix and combine until everything is evenly mixed.
Spread onto some nice hearty bread and either toast open faced or top with another piece of bread and grill.   I also love to use this as an appetizer by spreading some of the cheese mixture onto a loaf of French Bread which I have sliced in half. Spread both halves of the French Bread with the cheese Mixture and place onto a cookie sheet and then into a preheated 350-375 oven for about 10 minutes then on broil for 5 minutes until top is bubbling.


'Treasure this day. No matter what is going on, look for the gifts and blessings in everything you are facing.  It might be challenging if the day is not going well, but still they are there.  Once you find them, things will shift for the better.'

Saturday, March 15, 2014

Fruit Pyroshki - Fruit Tarts

A friend sent me a message via Facebook yesterday telling me that she was looking for the recipe for the Pyroshki that belongs to the photo I have posted here on my blog.  This spurred me on to do some baking on this rainy and windy Saturday.  Thank you for the 'reminder' Natalie, I enjoyed my baking day and the house smells amazing.  This recipe is one that my Mother passed down to me, My parents baked these in their Vegetarian Restaurant (Doukhobor Village Restaurant) that was beside the Doukhobor Village Museum - the museum now known as Doukhobor Discovery Centre, it is located just outside of  Casltegar, BC.  Sadly my parents had to close the restaurant due their health.  I have fond memories of  these Fruit Pyroshki that my Mom made when I was growing up and when there was an abundance of fruit from their orchard in the Summer and also in the Winter when this fruit was processed and frozen for later use.

Today in my recipe I am using fresh strawberries and apples, the sour cherries are from my freezer as are the blackberries, which came from the blackberry bush that is growing in my back yard.
I don't have an orchard like my parents had, but in the last few years I have planted an apple, pear, fig, plum and sour cherry tree and have strawberries and raspberry plants too.
 My parents taught me that if you grow your own fruit (and vegetables)
 you can be self sufficient and be able to provide your family with nutritious food.  For this I am very thankful.  'Spaseebo' Mom and Dad'
We enjoy the fruits during their growing season in the summer time and I also freeze quite a bit to have throughout the winter - just like Mom did!  Enjoy this recipe.

Fruit Pyroshki

The ingredients you will need for the Pyroshki dough.

Combine the dry ingredients in a large bowl and cut in your butter and shortening.
 Mother used Margarine but I have changed to butter and why shortening too - because Mom says so!

 This shows the butter has been cut into the flour and it's the size of a pea.  Perfect!

The mixed wet ingredients are incorporated into the dry.

The dough should look like this, a bit rough but you don't want to over mix.
It will all come together once you start rolling it out.

Put dough out onto a floured counter and roll it out to approximately 1/4 inch thick.
Re roll any pieces and cut again.

Cut with a large size cutter (as you can see I favour a large glass) to fit into a muffin tin.

If using fresh fruit, wash and cut into smaller pieces.

Add sugar and cornstarch, mix and it's ready to fill the pastry shells.

Peel and great the apples.


Ingredients for the apple cinnamon filling.
  
Such beautiful and delicious plate of 'Summer'.....enjoy with some whipped cream or ice cream.
In my house they don't last too long and are eaten 'as is'.
These freeze very nicely too!

FRUIT PYROSHKI RECIPE

 Recipe will make 2-3 dozen Pyroshki - can be halved.

5 cups flour
2 teaspoons baking powder
1/2 cup sugar
1 teaspoon salt
1 3/4 cups butter
2 Tablespoon vegetable shortening
4 large eggs
1 cup milk, (I use 1% but any milk will do)


In a large bowl, mix the flour, sugar, salt and baking powder. Cut in butter and shortening.
In a small bowl whisk eggs and milk together and add to the dry ingredients.
With a spoon or spatula mix the dry and wet ingredients until combined, then place onto a well floured counter and roll out to 1/4 inch thick.  Cut into circles and place into a muffin tin, stretching the dough gently until it is level with the rim of the muffin tin.
Set aside and prepare the fruit fillings.
Fill the pastry lined muffin tins 3/4 full and bake in a 375 degree oven for 10-15 minutes. (until pastry browns nicely)
Remove from muffins tins and let cool on a rack.  Enjoy.

FRUIT FILLING;
Apple -  2-3 apples, grated, mix with  1 Tablespoon cinnamon and 3 Tablespoons sugar.
Strawberry - 2 cups fresh strawberries, wash and dice, sprinkle with 2 Tablespoons sugar and 1 Tablespoon cornstarch, combine.
Blackberry - 2 cups blackberries, 3 Tablespoons sugar, 1 Tablespoon cornstarch, combine.
Sour Cherry - 2 cups sour cherries, 3 Tablespoons sugar, 1 Tablespoon cornstarch, combine.
Any fruits of your choice can be used, fresh or frozen, the method is the same.  I don't like to add too much sugar to my fruits if they are very sweet themselves - it's your choice.

'Your life is a message to the world, make sure it's inspiring.'