Monday, January 13, 2014

Whole Wheat Sourdough Pasta and Ravioli

Pasta, a staple in every home, is a great choice for many quick and healthy meals.
My sourdough starter is doing very, very well as I have been using and feeding it often.
I came across a recipe for Sourdough Noodles that sounded very interesting,
 they were made with  Whole Wheat flour and with Sourdough starter.
  I am not really a fan of  store bought whole wheat pasta neither is my family. 
Too 'grainy' tasting but after trying this recipe I think we have a hit!
It has the benefit of being made from whole wheat flour/whole grain flour
and contains sourdough starter, both are good for you and your , diet.
I hope you try this for you and your family. 
 
WHOLE WHEAT SOURDOUGH PASTA/RAVIOLI 
 
Whole Wheat Sourdough Ravioli
 
The ingredients you will need.

Ingredients all mixed and kneaded together and covered.
Let sit 8 hours or overnight.  It will have doubled in size.

Rolled out pasta ready for the pasta cutter

Some of the dough cut and ready to be dried.

This bowl of noodles has been dried in the oven at 350 degrees for 5 minutes.

Sheets of whole wheat sourdough pasta ready to be made  into Ravioli.
 
This batch of noodles is being 'air dried'.  Testing to see if there is a difference in flavour.

Whole wheat sourdough pasta sheets now topped with a cheese filling.

After brushing the edges and center with an egg wash I added a top sheet of pasta.

With my fingers I pressed and 'sealed' all the edges.


I cut the ravioli into individual squares. Shapes are up to you.
Dusting with a bit of flour so they don't stick to the cookie sheet.
I covered them and put into the fridge until dinner time when I will cook them up fresh!
 

The whole wheat sourdough ravioli has been boiled for 2-3 minutes.
I added a homemade mushroom/tomato sauce layered in between pouches of cheese stuffed ravioli.

Little 'pillows of heaven'  ready for tasting.


Dinner of Whole wheat Sourdough Ravioli filled with Ricotta cheese, garlic, green onion
and some herb cream cheese mixture.  A nice green salad and some garlic bread.  Yum!
 
Whole wheat Sourdough Pasta Recipe
 
As another great use for the never-ending sourdough starter,
 these rustic noodles are thick, chewy, and delicious.
If you prefer your noodles less rustic, feel free to use a pasta machine.
This is great to put together the night before for the next day’s lunch or dinner.
Ingredients
 1 cup sourdough starter
3 cups whole wheat flour
6 egg yolks
 
Pour the sourdough starter into a mixing bowl.
Add the egg yolks and mix until combined. 
Add the whole wheat flour 1 cup at a time until all is incorporated.
Mix thoroughly until the mixture forms a ball.
(I dropped it onto the counter and kneaded together for about 2-3 minutes)
Cover.     Let sit for 8 hours or overnight.
The next day.....
       Place ball on counter and roll it out very, very thin.
(this is where I took out my pasta machine)
Trim the edges to make a rectangle.
    Slice the noodles in whatever shapes you please.
 
These can be left on the counter to dry
 or boiled immediately to serve with dinner.
I baked some of the pasta I made in a 350 oven for 5 minutes.
This dries it nicely and then it can be kept in a cool place until ready to be used.

 
'A bird sitting on a tree is never afraid of the branch breaking,
because her trust is not on the branch but on it's own wings.
Always believe in yourself.

Sunday, January 12, 2014

Seitan/Wheat Cutlets........ deliciously 'Home made'

SEITAN or WHEAT CUTLETS, a wonderful way to add extra protein to your dishes.
 
I had never heard of Seitan until 7 or 8 years ago when my son Rick told me about it.  Rick worked for Green Cuisine in their tofu factory in Victoria BC.  He kept raving about this product, how delicious it was and I asked him to buy me some to try.  What a hit!  We, the whole family loved it, the flavour, the texture, the versatility.  What we didn't like was the price!
I decided that I was going to learn how to make this myself and started my 'research'. 
I have made Seitan/Wheat Cutlets many times now and can't keep it in my fridge or freezer.
Seitan - What is it?
Definition: Although it is made from wheat, seitan has little in common with flour or bread. Also called “wheat meat”, “wheat gluten” or simply “gluten”, seitan becomes surprisingly similar to the look and texture of meat when cooked, making it a popular meat substitute. Seitan is also high in protein, making it a popular protein source for vegetarians. Asian restaurants often use seitan as a vegetarian mock meat, and seitan is also the base for several commercially available products such as Tofurky deli slices. 
Seitan can be prepared by hand using either whole wheat flour or vital wheat gluten and is made by rinsing away the starch in the wheat, leaving a high-protein gluten behind. Although not as common as tofu, seitan is quickly gaining popularity, particularly in vegetarian restaurants, due to its ability to take on the texture and flavor of meat. Prepared seitan can be found in the refrigerated section of most health food stores or make a batch at home. 'taken from 'about.com'
Seitan/Wheat Cutlets ready for the meal.
 
The ingredients you will need for the Seitan/Wheat Cutlets
 
After all ingredients are mixed together, kneaded -
the 'dough' is sliced and waiting to be dropped into the
broth and cooked.

The ingredients for the cooking Broth.

All the Seitan 'dough' has been sliced and dropped into the simmering broth.

The Seitan swells as it simmers, smelling delicious too!
  
The Seitan has been simmered for 30 minutes and then drained.

Ready to be incorporated into a meal by adding to stir fry,
stew, burger.  Flavour with BBQ sauce, grill, saute in some olive oil or butter.
The options are endless.  Enjoy.
 
SEITAN/WHEAT CUTLET RECIPE
 
Seitan Dough:
Makes about 2lbs, or 10 servings
2 Tablespoons reduced-sodium soy sauce
2 1/4 cups vital wheat gluten
1/2 teaspoon baking powder
 
Broth:
2 vegetable bullion cubes
2 Tablespoons reduced-sodium soy sauce
3-4 slices fresh ginger
(you can add other 'flavors' to the broth by adding in your favorite herbs, spices)
For Dough
Combine the soy sauce with 1 cup water in a small mixing bowl.  Place
the gluten flour and baking powder in a medium mixing bowl and stir together.
Gradually add the liquid to form a stiff dough (this will stiffen quickly), stirring with
a spoon at first, then working together with your hands.
Turn out onto floured counter and knead 30 times,
 then return to the bowl and cover with a clean cloth and let it rest for 15 minutes.
 
Meanwhile bring 10 cups of water to a simmer in a large soup pot. Add the bullion and ginger.
Divide the dough into two pieces and shape and pull into long,
 narrow loaves the shape of miniature French loaves.
With a sharp, serrated knife cut each section of dough crosswise into approximately 1/2 inch sections.
When the water comes to a simmer, drop each slice in gently.
Continue adding to simmering broth until all dough is done.
Simmer gently and steadily for 30 minutes. Drain but save the stock to use in soups or other purposes (it's delicious).  Seitan is ready to use in recipes calling for Seitan or 'meat'.
'recipe adapted from vegkitchen'
Enjoy!
 
'Time decides who you meet in our life.
 Your Heart decides who you want in your life.
And your behaviour decides who will stay in your life.'


Thursday, December 5, 2013

Quick Shredded Beet Salad/Spread/Filling

Beets... so rich and red and good for you, another Fall staple in our house.  My daughter Anastasia brought me a  big bag of beets from the Fraser Valley and  I  had 4 large beets left that needed to be used so I cooked  them up this morning and  put this together with the ingredients I had in my fridge.   ( Yes horseradish is a staple in my fridge) - my parents always had a plant or two growing at the edges of their gardens, there is nothing like fresh horseradish.  I too have a plant growing that has been passed down to me by my sister Holly that was passed down to her.   You can serve the this dish  as a salad or spread it onto a slice of bread and roll it up and then cut into slices as an appetizer or just serve it alongside any supper meal.  After fighting a bought of pneumonia my body was craving beets and horseradish definitely clears the sinuses.... this was the perfect fix for me.   I always cook up a pot of beans (kidney, Romano, chili, black beans ...) and keep them in the freezer for meals just like this.  They are always ready to drop into a soup, salad and many more dishes. My Japanese friend Yuko taught me a trick she uses when cooking beans, drop in a 4 inch piece of 'Kombu' - a seaweed that flavours the beans  so nicely  plus 'degasses' them too.
In today's salad I used chili beans that I just dropped into the bowl frozen, they cooled down the still warm  beets and by the time I had mixed the ingredients together the beans were perfectly thawed.

 Shredded Beet Salad/Spread/Filling

 The ingredients you will need.

All ingredients are chopped, shredded and ready to be mixed together.

Serve it on some crackers or multi grain bread.
  
 or serve it as a salad along with your dinner meal.
Enjoy.

SHREDDED BEET SALAD/SPREAD/FILLING

3-4 large beets boiled, roasted or steamed
1 cup cooked beans  of your choice
1/2 cup shredded sauerkraut
1/8 cup sweet onion finely chopped
1 large tablespoon mayonnaise (or oil )
 1 -2 Tablespoons shredded fresh horseradish (or to taste)
salt and pepper to taste
2 teaspoons red wine vinegar (optional)

Cook beets until tender,  let cool then shred into a large bowl.
 Add the rest of your ingredients and mix together.  
Serve as a salad, or spread it onto bread slices rolled thin and then roll it  
up jellyroll style and slice into pieces as an appetizer.  
You can spread some cream cheese on the bread before adding the beet mixture.
 Fill a pita pocket with this filling for a quick 'take a long' lunch.
Store in the fridge.

"Accept what is, let go of what was,  and have Faith in what will be."


Thursday, November 28, 2013

Pumpkin Chia Pudding

Pumpkin......nothing says Fall like pumpkins....if you have a vegetable garden then you must have grown a few pumpkins.   Growing up in Ootischenia  my parents always had a wonderful, productive garden and Dad would always plant a pumpkin or two or 12!  He would plant the seeds in many areas, piles of compost, small corners of several of his gardens and we would have an abundance of pumpkins..........I did not manage to grow pumpkins this year so I had to go with a store bought.      Here is a recipe that is quick and so tasty, everyone in your family will love it.
 Did you know there is a song sung by 'The Be Good Tanyas' called Ootischenia?


 Pumpkin Chia Pudding

The ingredients you will need.

 Yum!  Ready for sampling.....enjoy.


Pumpkin Chia Pudding Recipe
Yield: 2 servings
 
Ingredients
1/3 cup canned pumpkin
2 Tbsp brown sugar (or stevia to taste)
1/4 tsp pumpkin pie spice
1/4 tsp cinnamon
3/4 cup milk or almond milk/coconut milk
1/4 cup chia seeds
Instructions
In a medium bowl, whisk together the pumpkin, sugar and spices.
Stir in the milk or almond milk.
Stir in the chia seeds, then let mixture sit in the fridge for 1 hour or until thickened to a pudding consistency. (You can leave overnight).
Serve chilled.
"My life is a song, every lyric, every note is up to me.
And though it may fall out of tune, in the end
what matters most is how it has touched the Hearts of Others."
....author unknown


Tuesday, November 12, 2013

BEAN MINESTRONE

SOUP, growing up Mom always had a pot of soup for supper.  It could have been vegetable, pea, mushroom or one of many others.  Bean Minestrone is a soup that I have been making for my family for many, many years.  It's very quick to make, versatile and filling - you can change the vegetables to what you may have on hand in the fridge and pantry.  Soup is just so very filling and comforting and uses simple ingredients.  I hope you enjoy this recipe as much as my family does.
 
 
BEAN MINESTRONE
 Mmmmm....so warm and filling.
The ingredients you will need.
 
 The vegetables all diced and ready for the pot.
 
 The onions have sauteed and the tomatoes and vegetables have been added.

 Spinach is added after the tomato vegetable mixture has simmered for a bit.
 
 Water is added and brought to a boil.
 
 Pasta and herbs have been added and it's smelling very fragrant.
Simmer for another 10 minutes or so until the vegetables and pasta are tender.
 
 
Parmesan Cheese is shredded and ready to sprinkle over the soup in your bowl.
 If I have left over Parmesan rind I will drop it into the soup as it simmers,
adding a wonderful depth of flavour to the soup.

The finished Bean Minestrone all ready for dinner.
Add some cheese and bread and you are set!
 
 Hearty, and fragrant....beautiful to eat and look at.
 
BEAN MINESTRONE SOUP RECIPE
 
3-4 Tbsp. olive oil
1 large onion, diced
1 carrot, diced
1 stalk celery, diced
1 small zucchini, diced ( or spinach/swiss chard)
2 tomatoes, diced or 1- 14 oz. can diced, do not drain
1 large potato, peeled and diced
3 cloves garlic, minced
8 cups water
3/4 cup small pasta
1 tsp dried oregano
1 tsp dried basil or 2 Tbsp fresh
1 can 14 oz. kidney beans ( or your favorite bean), drained
1/4 cup Parmesan cheese, grated
1/2 cup fresh parsley, chopped
Salt and Pepper to taste.
4-6 Tbsp. red wine vinegar ( optional) but it adds a bit of tang.
In a large pot saute onions in the olive oil, stirring occasionally for 3 minutes.
Add carrots, celery, zucchini, tomatoes, potato and garlic.
 Cook 3 minutes, add the water and bring to a boil.
Stir in pasta, oregano and basil. Cook uncovered until pasta is tender but firm and
 vegetables are cooked (10-12 minutes).
Add the beans, Parmesan and parsley(and red wine vinegar to taste).
  Season with salt and pepper.
Makes 8 large servings.
 
 "A dream you dream alone  is only a dream.  A dream you dream together is reality."
John Lennon


Monday, November 11, 2013

HOMEMADE DILL PICKLES........

 PICKLES........my family loves pickles, and  it's been too many years since I have made a batch.  Growing up Mom always had homemade Pickles in the cellar so that when we had a craving for them, all we had to do was run down to the cellar and pick a jar.  YUM!!
Making Pickles brings back so many memories of 'growing up' my parents had such beautiful vegetable gardens which were always full of cucumbers.  Long ones, round ones and of course pickling cucumbers.....I remember walking out to the back yard and into the garden and being able to pick a cucumber (or two or three) still warm from the sun.  So fresh and crisp.....how fortunate we were.  I now know how fortunate we were as I have started a vegetable garden ( on a much smaller scale) than my parents had.  It is a lot of work but oh so very rewarding when you can just walk out of your home and into your garden and pick that cucumber.
 The cucumbers I used did not come from my own garden but from a garden in Surrey called 'God's Little Acre'.... you will find the story/history here: http://godslittleacrefarm.com/our-story/....  Thank you to this farm and the good work it does......  thank you also to a friend who picked up my cucumbers from the farm and brought them here to Gibsons. The cucumbers were perfect, so fresh and crisp and ready to be made into Pickles, just like Mom used to make. Every summer we drove from Prince Rupert with our children to (Ootischenia - a little community just outside of Castlegar) to visit my parents and extended family during the garden growing season.  My Mom would save  the cucumbers for picking just so my children could  pick their very own fresh cucumber from the vine..  She would also ask my children - they were young, perhaps 4, 5 and 8, to help her make pickles....what a great lesson for my children to learn....while making these pickles 'Baba'/Grandma' would tell them stories from her childhood,  and they would fill those quart jars as quickly as she would fill their hearts with memories.  Our family would then  pack up a few jars of pickles to take back home with us to eat in the winter months and relive the memories of summer.  It's not just the 'making of pickles' but the 'going home' that makes this job so wonderful......enjoy.


 DILL PICKLES.....


  Ingredients you will need.


The cucumbers washed and drained.

Garlic, beets and carrots all sliced and ready for the jars.
 
Fresh dill to be added to the jars
Dill, sliced beets, garlic cloves get dropped into the bottom of the jar
 
The whole cucumbers are stacked for maximum filled
jars, then carrot sticks are slid in between the cucumbers.
  
 Cucumbers, beets, garlic, dill and carrots filling up
the quart jars until all the cucumbers are used up.
The stuffed jars are then filled with hot brine, topped with sterilized seals and rings.
Put into a canner and boiled just until the cucumbers change from the deep green colour
to the pale green then are quickly removed and put on a rug or blanket for cooling.
 
The hot jars are flipped onto their lids to keep the lid hot as long as possible,
   to help with the sealing process. (this is a tip from Mom)  Cover with a blanket or rug.
 Let the jars cool before storing and then wait (if you can) about a week before eating.
 
 The finished Pickles, beautiful....some are green, others are a lovely
purple (because of the added beet slices) our favorite.  Standing in behind
is another pickle mix (sweet & sour),  I will post  this recipe at a later time.
 
DILL PICKLES...the recipe
 
pickling cucumbers (approximately 10-15 lbs)
dill, a large bunch
4-6 carrots, sliced into sticks
4-6 beets, sliced thinly into either half circles or sticks
10 heads garlic (approximate)
2-3 dozen Quart jars, lids, screw tops
 Canner or large pot for processing
 
BRINE
20 cups water
1 - 2 cups vinegar
5 Tablespoons pickling salt
In to a large pot, add the water, vinegar and salt. Bring to a boil - boil for 1 minute.
Take off stove and set aside.
METHOD
Into a sterile quart jar, add 3 cloves garlic, bunch of dill and a few slices of beets
top with pickling cucumbers, fill bottom layer slip a few slices of carrots in between the cucumber then top with more cucumbers, not going higher than the neck of the jar.
 
With a glass measuring cup pour hot brine over cucumbers/carrots/beets/garlic in the quart jar,
wipe edge and seal with lid and screw top.
(seals should be heated and sterilized by putting them into a bowl and pouring boiling water over them, let them sit in this until you are ready to seal the jar.)
Wipe seal/lid with clean towel, place over filled jar and screw on tightly.
When all jars are done, place into canner, fill with cool water to the bottom of the 'neck' of the jar  (below the ring) and cover with canner lid, bring to a boil and watch carefully - boil just until the colour of the cucumbers  start to change from deep green to a pale green.  Don't worry if all cucumbers in the jar are not the same pale colour.  They will continue to cook while cooling and will make a perfectly 'crisp' pickle.  Remove from canner and place upside down onto a blanket or rug, cover with another blanket and let sit until cool.  Store in a cool dark spot, wait at least a week before sampling.  If you find a jar or two have not sealed, just store them in the fridge until ready to eat....
 
 'Not everyone will understand your journey.   That's fine. 
It's not their journey to make sense of.  
It's yours.'


Friday, October 25, 2013

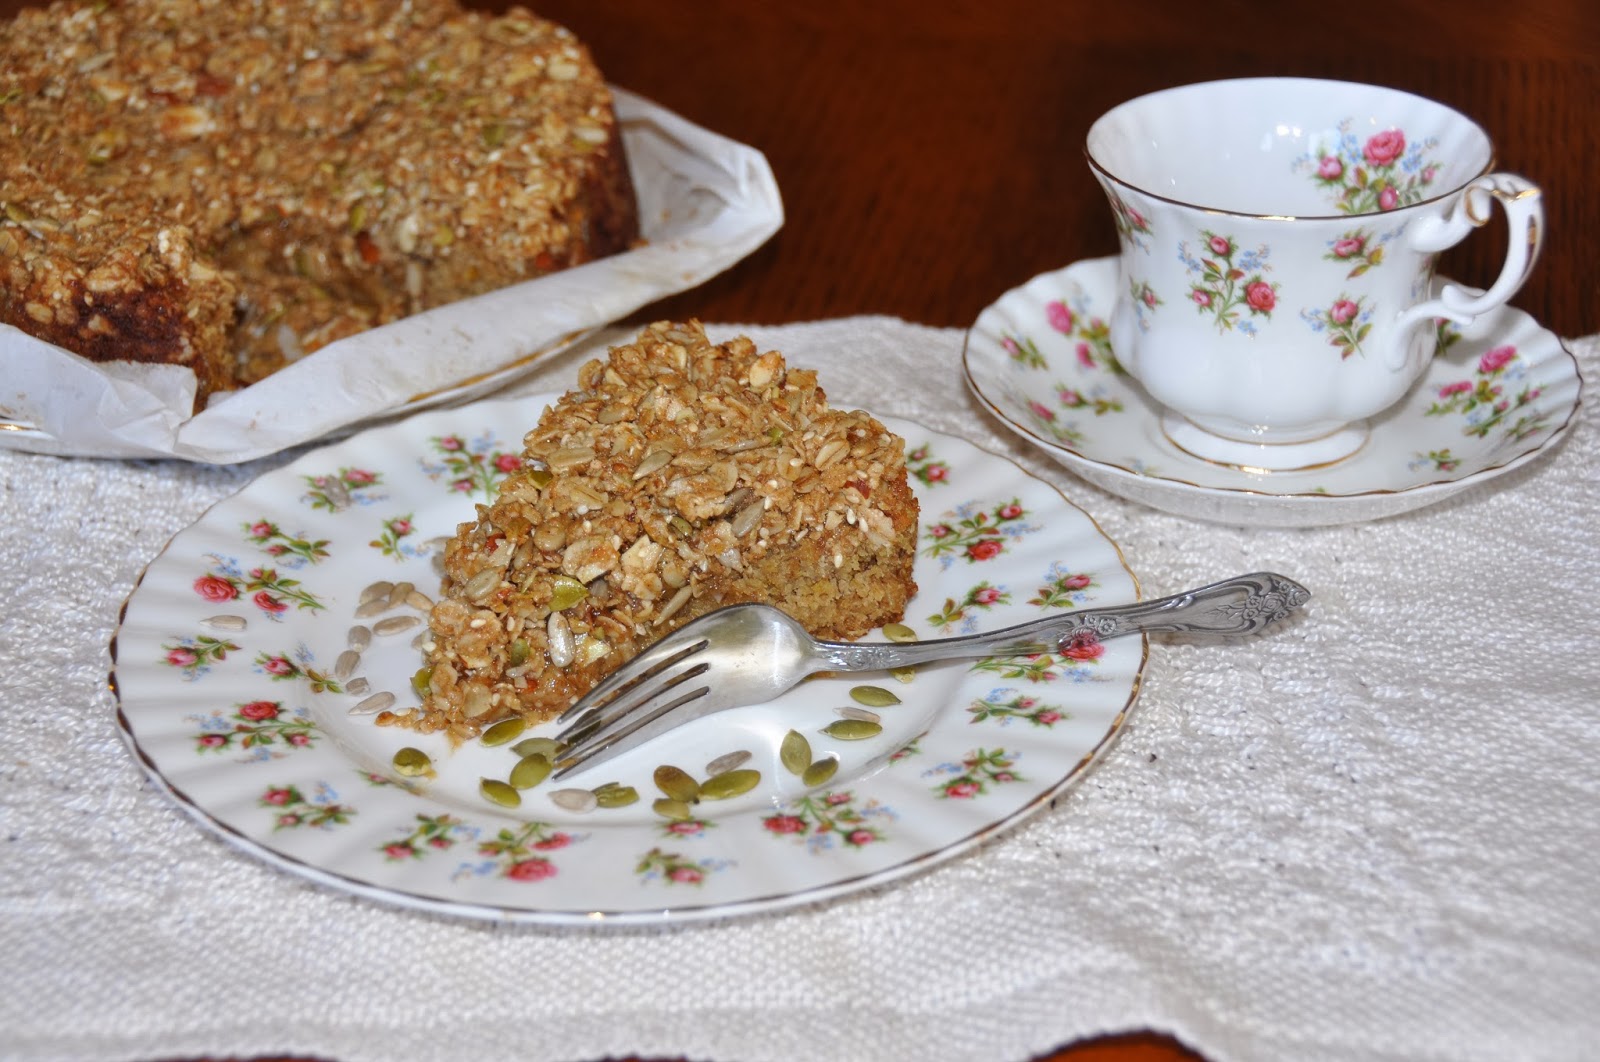
SEEDY BANANA OATMEAL CAKE

 
What do you do with over ripe bananas - you bake a cake!  I have made my share of  Banana breads,  Banana muffins,  Banana cookies,Banana Chips and I've even made Banana Jam!   Today I  am baking a more 'dressed up ' Banana Cake that I found online and want to share with you.
 
Seedy Banana Oatmeal Cake
A beautiful cake with a bit of citrus, cinnamon and crunch.


The ingredients you will need.
 In the bowl to the right is the seedy topping all mixed together -  oatmeal,
 brown sugar, butter, sunflower seeds, sesame seeds and pumpkin seeds,
sprinkled with some cinnamon and lemon rind.
 
Oatmeal for the cake batter.

The butter and brown  sugar ready to be creamed
 
Prepared pan, with parchment paper buttered and waiting for the batter..
 
 Perfect with a cup of tea and perhaps family or friends to share.
 
 
Seedy Banana Oatmeal Cake Recipe

Serves 8 to 10

4 oz (8 T) butter,  room temperature
3/4 C brown sugar
2 eggs, room temperature
2 large very ripe bananas, mashed
1 tsp. vanilla
zest of 1/2 lemon
3/4 Cup flour
1 1/4 Cups  oatmeal
heaping 1/4 tsp. salt
1 tsp. baking soda

Topping

3/4 Cup  oatmeal
1/3 Cup brown sugar
zest of 1/2 lemon
1/2 tsp. cinnamon
1 Tbsp. flour
1/3 Cup finely chopped nuts or seeds
2 oz (4 Tbsp.) butter, melted

Preheat oven to 350 degrees.
Prepare a 9” spring form cake pan with butter and parchment.

Whisk together dry ingredients for the topping.
 Add melted butter and stir with a fork until crumbly. Set aside.

Whisk together flour, salt, baking soda and oats.
Cream butter and sugar until light and fluffy. Scrape down the sides of the bowl.
Add eggs one at a time, mixing thoroughly after each addition.
Scrape down the bowl and add mashed banana and vanilla. Mix thoroughly.
Stir in dry ingredients until just combined. Pour into prepared pan and smooth out evenly.

Sprinkle topping over cake batter and press down gently.
Bake for 30 to 35 minutes or until a toothpick inserted comes out moist but clean. Cool completely on a wire rack. Run a thin knife around the edge of the cake and remove cake pan ring.
 
 
"Today I go back to the basics of life: forgiveness, courage, gratitude, love, and humor."