Thursday, December 5, 2013

Quick Shredded Beet Salad/Spread/Filling

Beets... so rich and red and good for you, another Fall staple in our house.  My daughter Anastasia brought me a  big bag of beets from the Fraser Valley and  I  had 4 large beets left that needed to be used so I cooked  them up this morning and  put this together with the ingredients I had in my fridge.   ( Yes horseradish is a staple in my fridge) - my parents always had a plant or two growing at the edges of their gardens, there is nothing like fresh horseradish.  I too have a plant growing that has been passed down to me by my sister Holly that was passed down to her.   You can serve the this dish  as a salad or spread it onto a slice of bread and roll it up and then cut into slices as an appetizer or just serve it alongside any supper meal.  After fighting a bought of pneumonia my body was craving beets and horseradish definitely clears the sinuses.... this was the perfect fix for me.   I always cook up a pot of beans (kidney, Romano, chili, black beans ...) and keep them in the freezer for meals just like this.  They are always ready to drop into a soup, salad and many more dishes. My Japanese friend Yuko taught me a trick she uses when cooking beans, drop in a 4 inch piece of 'Kombu' - a seaweed that flavours the beans  so nicely  plus 'degasses' them too.
In today's salad I used chili beans that I just dropped into the bowl frozen, they cooled down the still warm  beets and by the time I had mixed the ingredients together the beans were perfectly thawed.

 Shredded Beet Salad/Spread/Filling

 The ingredients you will need.

All ingredients are chopped, shredded and ready to be mixed together.

Serve it on some crackers or multi grain bread.
  
 or serve it as a salad along with your dinner meal.
Enjoy.

SHREDDED BEET SALAD/SPREAD/FILLING

3-4 large beets boiled, roasted or steamed
1 cup cooked beans  of your choice
1/2 cup shredded sauerkraut
1/8 cup sweet onion finely chopped
1 large tablespoon mayonnaise (or oil )
 1 -2 Tablespoons shredded fresh horseradish (or to taste)
salt and pepper to taste
2 teaspoons red wine vinegar (optional)

Cook beets until tender,  let cool then shred into a large bowl.
 Add the rest of your ingredients and mix together.  
Serve as a salad, or spread it onto bread slices rolled thin and then roll it  
up jellyroll style and slice into pieces as an appetizer.  
You can spread some cream cheese on the bread before adding the beet mixture.
 Fill a pita pocket with this filling for a quick 'take a long' lunch.
Store in the fridge.

"Accept what is, let go of what was,  and have Faith in what will be."


Thursday, November 28, 2013

Pumpkin Chia Pudding

Pumpkin......nothing says Fall like pumpkins....if you have a vegetable garden then you must have grown a few pumpkins.   Growing up in Ootischenia  my parents always had a wonderful, productive garden and Dad would always plant a pumpkin or two or 12!  He would plant the seeds in many areas, piles of compost, small corners of several of his gardens and we would have an abundance of pumpkins..........I did not manage to grow pumpkins this year so I had to go with a store bought.      Here is a recipe that is quick and so tasty, everyone in your family will love it.
 Did you know there is a song sung by 'The Be Good Tanyas' called Ootischenia?


 Pumpkin Chia Pudding

The ingredients you will need.

 Yum!  Ready for sampling.....enjoy.


Pumpkin Chia Pudding Recipe
Yield: 2 servings
 
Ingredients
1/3 cup canned pumpkin
2 Tbsp brown sugar (or stevia to taste)
1/4 tsp pumpkin pie spice
1/4 tsp cinnamon
3/4 cup milk or almond milk/coconut milk
1/4 cup chia seeds
Instructions
In a medium bowl, whisk together the pumpkin, sugar and spices.
Stir in the milk or almond milk.
Stir in the chia seeds, then let mixture sit in the fridge for 1 hour or until thickened to a pudding consistency. (You can leave overnight).
Serve chilled.
"My life is a song, every lyric, every note is up to me.
And though it may fall out of tune, in the end
what matters most is how it has touched the Hearts of Others."
....author unknown


Tuesday, November 12, 2013

BEAN MINESTRONE

SOUP, growing up Mom always had a pot of soup for supper.  It could have been vegetable, pea, mushroom or one of many others.  Bean Minestrone is a soup that I have been making for my family for many, many years.  It's very quick to make, versatile and filling - you can change the vegetables to what you may have on hand in the fridge and pantry.  Soup is just so very filling and comforting and uses simple ingredients.  I hope you enjoy this recipe as much as my family does.
 
 
BEAN MINESTRONE
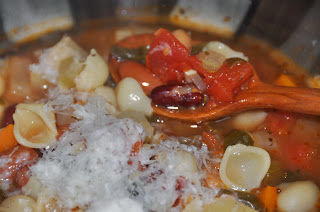
 Mmmmm....so warm and filling.
The ingredients you will need.
 
 The vegetables all diced and ready for the pot.
 
 The onions have sauteed and the tomatoes and vegetables have been added.

 Spinach is added after the tomato vegetable mixture has simmered for a bit.
 
 Water is added and brought to a boil.
 
 Pasta and herbs have been added and it's smelling very fragrant.
Simmer for another 10 minutes or so until the vegetables and pasta are tender.
 
 
Parmesan Cheese is shredded and ready to sprinkle over the soup in your bowl.
 If I have left over Parmesan rind I will drop it into the soup as it simmers,
adding a wonderful depth of flavour to the soup.

The finished Bean Minestrone all ready for dinner.
Add some cheese and bread and you are set!
 
 Hearty, and fragrant....beautiful to eat and look at.
 
BEAN MINESTRONE SOUP RECIPE
 
3-4 Tbsp. olive oil
1 large onion, diced
1 carrot, diced
1 stalk celery, diced
1 small zucchini, diced ( or spinach/swiss chard)
2 tomatoes, diced or 1- 14 oz. can diced, do not drain
1 large potato, peeled and diced
3 cloves garlic, minced
8 cups water
3/4 cup small pasta
1 tsp dried oregano
1 tsp dried basil or 2 Tbsp fresh
1 can 14 oz. kidney beans ( or your favorite bean), drained
1/4 cup Parmesan cheese, grated
1/2 cup fresh parsley, chopped
Salt and Pepper to taste.
4-6 Tbsp. red wine vinegar ( optional) but it adds a bit of tang.
In a large pot saute onions in the olive oil, stirring occasionally for 3 minutes.
Add carrots, celery, zucchini, tomatoes, potato and garlic.
 Cook 3 minutes, add the water and bring to a boil.
Stir in pasta, oregano and basil. Cook uncovered until pasta is tender but firm and
 vegetables are cooked (10-12 minutes).
Add the beans, Parmesan and parsley(and red wine vinegar to taste).
  Season with salt and pepper.
Makes 8 large servings.
 
 "A dream you dream alone  is only a dream.  A dream you dream together is reality."
John Lennon


Monday, November 11, 2013

HOMEMADE DILL PICKLES........

 PICKLES........my family loves pickles, and  it's been too many years since I have made a batch.  Growing up Mom always had homemade Pickles in the cellar so that when we had a craving for them, all we had to do was run down to the cellar and pick a jar.  YUM!!
Making Pickles brings back so many memories of 'growing up' my parents had such beautiful vegetable gardens which were always full of cucumbers.  Long ones, round ones and of course pickling cucumbers.....I remember walking out to the back yard and into the garden and being able to pick a cucumber (or two or three) still warm from the sun.  So fresh and crisp.....how fortunate we were.  I now know how fortunate we were as I have started a vegetable garden ( on a much smaller scale) than my parents had.  It is a lot of work but oh so very rewarding when you can just walk out of your home and into your garden and pick that cucumber.
 The cucumbers I used did not come from my own garden but from a garden in Surrey called 'God's Little Acre'.... you will find the story/history here: http://godslittleacrefarm.com/our-story/....  Thank you to this farm and the good work it does......  thank you also to a friend who picked up my cucumbers from the farm and brought them here to Gibsons. The cucumbers were perfect, so fresh and crisp and ready to be made into Pickles, just like Mom used to make. Every summer we drove from Prince Rupert with our children to (Ootischenia - a little community just outside of Castlegar) to visit my parents and extended family during the garden growing season.  My Mom would save  the cucumbers for picking just so my children could  pick their very own fresh cucumber from the vine..  She would also ask my children - they were young, perhaps 4, 5 and 8, to help her make pickles....what a great lesson for my children to learn....while making these pickles 'Baba'/Grandma' would tell them stories from her childhood,  and they would fill those quart jars as quickly as she would fill their hearts with memories.  Our family would then  pack up a few jars of pickles to take back home with us to eat in the winter months and relive the memories of summer.  It's not just the 'making of pickles' but the 'going home' that makes this job so wonderful......enjoy.


 DILL PICKLES.....


  Ingredients you will need.


The cucumbers washed and drained.

Garlic, beets and carrots all sliced and ready for the jars.
 
Fresh dill to be added to the jars
Dill, sliced beets, garlic cloves get dropped into the bottom of the jar
 
The whole cucumbers are stacked for maximum filled
jars, then carrot sticks are slid in between the cucumbers.
  
 Cucumbers, beets, garlic, dill and carrots filling up
the quart jars until all the cucumbers are used up.
The stuffed jars are then filled with hot brine, topped with sterilized seals and rings.
Put into a canner and boiled just until the cucumbers change from the deep green colour
to the pale green then are quickly removed and put on a rug or blanket for cooling.
 
The hot jars are flipped onto their lids to keep the lid hot as long as possible,
   to help with the sealing process. (this is a tip from Mom)  Cover with a blanket or rug.
 Let the jars cool before storing and then wait (if you can) about a week before eating.
 
 The finished Pickles, beautiful....some are green, others are a lovely
purple (because of the added beet slices) our favorite.  Standing in behind
is another pickle mix (sweet & sour),  I will post  this recipe at a later time.
 
DILL PICKLES...the recipe
 
pickling cucumbers (approximately 10-15 lbs)
dill, a large bunch
4-6 carrots, sliced into sticks
4-6 beets, sliced thinly into either half circles or sticks
10 heads garlic (approximate)
2-3 dozen Quart jars, lids, screw tops
 Canner or large pot for processing
 
BRINE
20 cups water
1 - 2 cups vinegar
5 Tablespoons pickling salt
In to a large pot, add the water, vinegar and salt. Bring to a boil - boil for 1 minute.
Take off stove and set aside.
METHOD
Into a sterile quart jar, add 3 cloves garlic, bunch of dill and a few slices of beets
top with pickling cucumbers, fill bottom layer slip a few slices of carrots in between the cucumber then top with more cucumbers, not going higher than the neck of the jar.
 
With a glass measuring cup pour hot brine over cucumbers/carrots/beets/garlic in the quart jar,
wipe edge and seal with lid and screw top.
(seals should be heated and sterilized by putting them into a bowl and pouring boiling water over them, let them sit in this until you are ready to seal the jar.)
Wipe seal/lid with clean towel, place over filled jar and screw on tightly.
When all jars are done, place into canner, fill with cool water to the bottom of the 'neck' of the jar  (below the ring) and cover with canner lid, bring to a boil and watch carefully - boil just until the colour of the cucumbers  start to change from deep green to a pale green.  Don't worry if all cucumbers in the jar are not the same pale colour.  They will continue to cook while cooling and will make a perfectly 'crisp' pickle.  Remove from canner and place upside down onto a blanket or rug, cover with another blanket and let sit until cool.  Store in a cool dark spot, wait at least a week before sampling.  If you find a jar or two have not sealed, just store them in the fridge until ready to eat....
 
 'Not everyone will understand your journey.   That's fine. 
It's not their journey to make sense of.  
It's yours.'


Friday, October 25, 2013

SEEDY BANANA OATMEAL CAKE

 
What do you do with over ripe bananas - you bake a cake!  I have made my share of  Banana breads,  Banana muffins,  Banana cookies,Banana Chips and I've even made Banana Jam!   Today I  am baking a more 'dressed up ' Banana Cake that I found online and want to share with you.
 
Seedy Banana Oatmeal Cake
A beautiful cake with a bit of citrus, cinnamon and crunch.


The ingredients you will need.
 In the bowl to the right is the seedy topping all mixed together -  oatmeal,
 brown sugar, butter, sunflower seeds, sesame seeds and pumpkin seeds,
sprinkled with some cinnamon and lemon rind.
 
Oatmeal for the cake batter.

The butter and brown  sugar ready to be creamed
 
Prepared pan, with parchment paper buttered and waiting for the batter..
 
 Perfect with a cup of tea and perhaps family or friends to share.
 
 
Seedy Banana Oatmeal Cake Recipe

Serves 8 to 10

4 oz (8 T) butter,  room temperature
3/4 C brown sugar
2 eggs, room temperature
2 large very ripe bananas, mashed
1 tsp. vanilla
zest of 1/2 lemon
3/4 Cup flour
1 1/4 Cups  oatmeal
heaping 1/4 tsp. salt
1 tsp. baking soda

Topping

3/4 Cup  oatmeal
1/3 Cup brown sugar
zest of 1/2 lemon
1/2 tsp. cinnamon
1 Tbsp. flour
1/3 Cup finely chopped nuts or seeds
2 oz (4 Tbsp.) butter, melted

Preheat oven to 350 degrees.
Prepare a 9” spring form cake pan with butter and parchment.

Whisk together dry ingredients for the topping.
 Add melted butter and stir with a fork until crumbly. Set aside.

Whisk together flour, salt, baking soda and oats.
Cream butter and sugar until light and fluffy. Scrape down the sides of the bowl.
Add eggs one at a time, mixing thoroughly after each addition.
Scrape down the bowl and add mashed banana and vanilla. Mix thoroughly.
Stir in dry ingredients until just combined. Pour into prepared pan and smooth out evenly.

Sprinkle topping over cake batter and press down gently.
Bake for 30 to 35 minutes or until a toothpick inserted comes out moist but clean. Cool completely on a wire rack. Run a thin knife around the edge of the cake and remove cake pan ring.
 
 
"Today I go back to the basics of life: forgiveness, courage, gratitude, love, and humor."

Thursday, October 24, 2013

CREAMY MUSHROOM SOUP

Fall is mushroom picking season and this year there are plenty.  Growing up our family had a tradition of picking mushrooms.  There were certain mushrooms that we picked in the Spring and others varieties in the Fall, these were fun times, family times.  Mom and Dad would  get us ready, Mom would pack a picnic lunch, Dad would get the pails and knives ready and into the truck.  In those days my brother and sisters (and sometimes a Cousin or two) got to ride in the back of the truck.  It sure was an adventure with the wind in our hair (bugs in our teeth) and all the fresh mountain air.  Up we would go with Mom and Dad inside the cab of the truck with Mom checking on everyone in the back and sometimes that 'finger would go wagging' .....but all in all we made it up to Dad's 'special' spots and off we went, always with my parents in sight, looking for the mushroom of the day.   Once back down from the mountain, it was time to clean and wash the mushrooms in preparation for the next step of either cooking some up for supper, pickling a batch and also canning up many jars to eat over winter. Growing up with life lessons such as this we continue to look for those mushrooms year after year. What fond memories, such a great family outing....I  miss those times but will always have them in my memories which I can draw upon at any time I wish to reminisce.....like hugs from the family.  My Mom made a delicious Mushroom Soup from some of the mushrooms we would bring home.  This recipe I am posting  is a simple version of my Mom's -   using mushroom I purchased from the grocery store but if you are lucky enough to have wild mushrooms, even better..... this soup comes together nice and quickly, perfect for today's busy family.


Creamy Mushroom Soup


The ingredients you will need.

The onion and garlic sautéed in some oil.

The shitake and button mushrooms have been added.
Seasoned with some thyme, salt and pepper.

After cooking for 10 or so minutes the mushroom mixture is looking very nice.

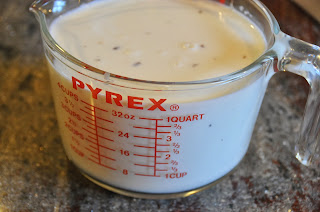
The milk and cream and broth mixture ready for the pot.

The milk/cream/broth mixture added to the sautéed onion and garlic
Flour has been added and then simmered until thickened.

The mushroom mixture is added back into the pot.

A few more minutes simmering and the mushroom soup is ready.
The whole house smells wonderful, soup is ready for our meal.
All that is needed is some fresh bread, butter and perhaps some cheese.
Enjoy.
 
  
OLD FASHIONED MUSHROOM SOUP  RECIPE


1 tbsp (15 ml) vegetable oil
1 small onion
4 cups (1 L) sliced shitake, button or brown mushrooms
1 tsp (5 ml) dried thyme leaves
1/4 tsp cayenne pepper flakes
1/2 tsp (2 ml) pepper
1/4 tsp (1 ml) salt
1 tbsp (15 ml) butter
2 tbsp (30 ml) all-purpose flour
2 cups (500 ml) vegetable broth
2 cups (500 ml) whole milk or ( 1 3/4 cup 2% milk and 1/4 cup whipping cream)


Preparation

In deep pot over medium, heat oil. Add onion and cook, stirring occasionally, for 5 minutes. Increase heat to high and add mushrooms. Cook, stirring often, for 5 minutes or until browned.
 Stir in thyme, pepper and salt; remove mixture from pan and reserve.
 Return pan to burner; reduce heat to medium-low. Melt butter in pan; sprinkle in flour.
 Stir until lightly browned. Add splash of broth; stir until smooth.
Add remaining broth and milk; stirring, bring to a boil.
 Cook, stirring, for 10-12 minutes or until slightly thickened. Stir in reserved mushrooms and any accumulated juices. Cook, stirring, for 5-7 minutes or until mushrooms are heated through.
Taste and adjust seasoning, if necessary.

“Don't ask yourself what the world needs.
 Ask yourself what makes you come alive and then go do that.
Because what the world needs is people who have come alive.”
Howard Thurman


Wednesday, October 16, 2013

CHILI CON CARNE

Happy Thanksgiving, hoping everyone had a wonderful gathering with family or friends.  There is so much to be thankful for:  family, friends,  a roof over our heads, food in our home and the fresh clean air we breathe.  This year we celebrated with my brother's family -  my nephew just recently got engaged and we were finally able to meet the 'newest addition to be'.  So good to have the house full, full of laughter,  lots of hugs, lots of memories to hold close in the years to come.  We ended the day with a beautiful sunset walk along the ocean to burn off a few of the calories from our dinner. 

It's been too many years since we have spent Thanksgiving with any our family both immediate and extended.   It really is a 'smorgasborg ' of flavours both in family members and food!   So very, very  thankful..... for all my family.

Today's recipe is one that is hearty, filling and simple to put together.  With the days getting cooler it's time to  bake some bread and enjoy it  with some Chili Con Carne.

Chili Con Carne
 

The ingredients you will need.
 
  a few more ingredients,
I'm using kidney beans that I made the day before.

 Vegetables simmering in tomatoes and seasonings.
 
The flour and cornmeal  have been added . - it is looking nice and thick and...smells so good!
 
Served in homemade wholewheat bread bowls with a pinch of shredded cheese.
 
CHILI CON CARNE RECIPE
 

4-5
1/4 cup fresh parsley
1/2 teaspoon black pepper
1 teaspoon salt
12 drops hot pepper sauce
1 (15 ounce) can kidney beans, drained or 2 cups homemade beans
3 tablespoons flour
3 tablespoons corn meal
1/2 cup water

Heat oil in a large saucepan over medium heat. Cook green pepper, and onion, until softened. Crumble over bouillon cubes, and stir in wine; continue to cook for a few minutes. Stir in chopped tomatoes, garlic, and tomato paste. Season with paprika, chili powder, cayenne pepper, basil, oregano, and parsley. Add the quinoa. Stir in salt and pepper.

Bring to a boil over high heat. Reduce heat to medium low.
Cover, and simmer for 90 minutes, stirring occasionally.

Stir in kidney beans, and hot pepper sauce.
You can add the reserved tomato juice if more liquid is needed.
Continue to simmer for an additional 30 minutes.

In a small bowl, whisk together the flour, corn meal, and water until smooth.
Stir into chili, and cook for a further 10 minutes, or until chili has thickened up.
 
'One of the best feelings in the world
is knowing your presence and absence
  both mean something to someone.'


Sunday, September 29, 2013

RHUBARB MARMALADE

RHUBARB MARMALADE..... I made a batch of this with the crop of rhubarb that grew this year.  The original recipe I found is made with oranges but I changed it up with limes instead.  I have not been successful in growing rhubarb for many,  many years  but since moving to the Sunshine Coast of  BC  - I can now grow rhubarb!  I was given a small plant  by my sister Wendy and originally had it planted near my deck but it did not do so well.  When I built a new garden area I transplanted this original plant (well it fell apart into 3 pieces) so I planted all three in different areas of the yard and they are all doing  very well.  I now have an abundance of rhubarb.  I am not a total fan of  marmalade ( with oranges) but this one is a keeper.  I also made another batch but substituted Limes for the Oranges and it became  Rhubarb Lime Marmalade - another good one!
 
 
Rhubarb Marmalade
 

The ingredients you will need  - substitute limes for oranges

  Oranges chopped and in the food processor.

 All processed and ready to  be added to the  pot.

 Rhubarb, oranges and sugars added.

 The  Rhubarb Marmalade is ready to be jarred.

Beautiful colour - Rhubarb Marmalade.
 
 
RHUBARB MARMALADE RECIPE
 

6 cups chopped fresh or frozen rhubarb
6 cups sugar
2 medium oranges
For Rhubarb Lime Marmalade ( use 3 limes - omit oranges)

Directions

Combine rhubarb and sugar in a Dutch oven.
Grind oranges, including the peels, in a food processor; add to rhubarb mixture.
Bring to a boil.
Reduce heat and simmer, uncovered, stirring often until marmalade sheets from a spoon
 about 1 hour.
Remove from the heat; skim off foam.
Carefully ladle hot mixture into hot half-pint jars, leaving 1/4-in. head space.
Remove air bubbles; wipe rims and adjust lids.
Process for 10 minutes in a boiling-water canner.

Yield: about 8 half-pints.
If using frozen rhubarb, measure rhubarb while still frozen, then thaw completely.
Drain in a colander, but do not press liquid out.


'I hope I can be the Autumn leaf, who looked at the sky and lived.
And when it was time to leave, gracefully it knew life was a gift.'
 — Dodinsky